

Photography has been a journey of constant learning, from mastering the technical aspects to developing my own creative style.
Over the years, I’ve gathered insights from every shoot, gear upgrade, and editing session that ultimately fit into these 13 photography lessons learned.
Whether it’s about equipment, file management, or the art of patience, each photography lesson has shaped the way I approach photography today.
In this post, I’ll share some of the key lessons I’ve learned that can help both beginners and experienced photographers alike.
This post contains affiliate links. As an Amazon Associate, we earn from qualifying purchases. If you buy through one of our links, we may earn a small commission at no extra cost to you. Read our full disclosure policy.
1. File Storage
When I first discovered Amazon Photos, I was blown away. It felt like the perfect solution to my constant worry about external hard drives failing, getting lost, or stolen.
Amazon Photos is hands-down the best cloud-based photo storage app I’ve used. I tried Dropbox for a while with its 1TB plan, but it quickly became too expensive and limiting. While Dropbox’s folder organization was nice, Amazon Photos eliminates the need for it altogether.
As an Amazon Prime subscriber (and I assume you are, too), adding it to my workflow was seamless. Just download the Amazon Photo app on your phone and computer, set up permissions, and it runs quietly in the background, syncing everything automatically.
The two standout features are unlimited storage for photos (for any file type!) and incredible search functionality. Videos do require an extra fee, but for photos, it’s unbeatable.
Amazon’s AI auto-tags every photo you upload, making search effortless. Looking for a cat, van, tree, mountain, or backpack? Just type it in, and the results pop up—no manual tagging or folder structures needed.
If you know the file name (more on that next), just type in “Arizona” and everything you ever included from Arizona will pop up!
It’s streamlined, reliable, and has completely transformed how I store and access my images.
2. File Naming
File naming took me many years to perfect, but now I have a system that works seamlessly for me.
And I am willing to bet it will for you too!
Every edited file follows this structure:
Specific subject (e.g., Red Rock Sunset) / location (e.g., city, state, country, business) / date / camera used (e.g., R5, Mini 3 Pro, or Hero 9) / file number / file type.
For example:
Playa Amapas Sunset Cave_Puerto Vallarta_Jalisco_Mexico_ArboursAbroad_150324-R5-37.jpg
This system allows me to find photos based on any detail—specific or broad—like location, subject, date, or even the camera used.
I always format dates as day, month, year (DDMMYY) because it’s more intuitive for searches. For instance, if I know a photo was taken in March 2024, I can search “0324” and instantly pull everything from that month. Using the U.S. format (MMDDYY) would complicate searches, as I’d need to guess or manually input the day, which slows everything down.
The same logic applies for other search criteria. Whether I’m looking for photos from a specific country, taken with a certain camera, or of a unique subject—like a cave—I can find them quickly and efficiently.
3. Organization
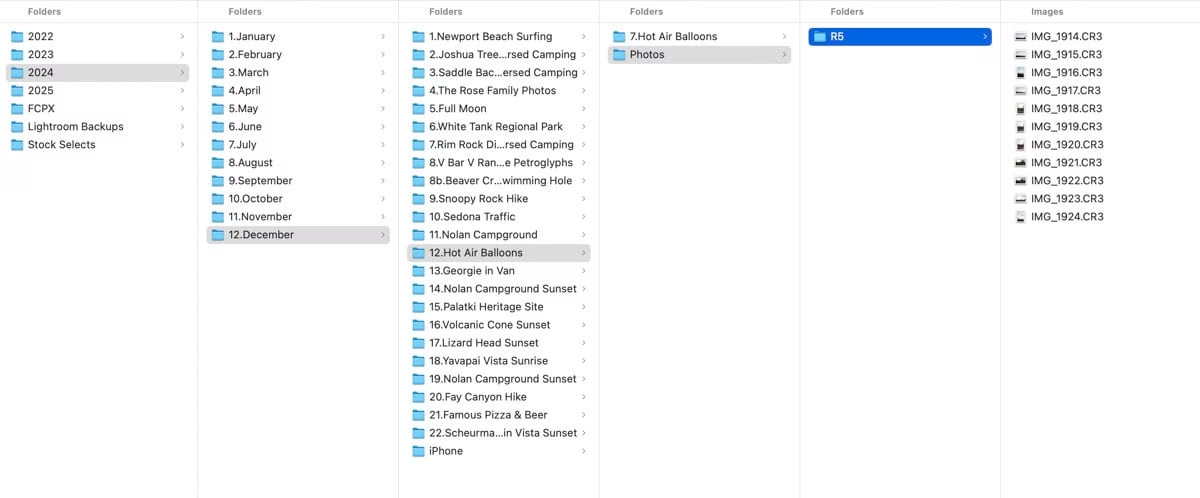
When it comes to organizing files on my hard drives, I’ve developed a system I’m genuinely stoked about.
Heather might say I go a little overboard with folders, but I haven’t found a better way to keep things organized.
My system mirrors my file-naming structure, starting broad and narrowing down. Here’s how it works:
- Begin with year, then month, followed by the shoot date and specific location.
- Separate files by photo or video and the camera used.
- Place unedited files into a “RAW” folder.
Once files are edited, they’re moved into the main folder for that location.
From there, I further organize them by their final purpose, such as Blog, 2K, or Full-Res JPEG.
This system keeps everything easy to find and ready for whatever project I’m working on, whether it’s publishing a blog post, creating social content, or uploading to stock.
4. File Size
File size is often misunderstood. I used to think that the largest dimensions automatically meant the highest quality image. While that’s partially true, it really depends on the file’s purpose.
For example, uploading a 40-megapixel image to social media will actually look worse than a 400KB image. Why? Platforms downsize large files to save server space, which degrades quality. Instead, exporting at 60% quality and 2,000 pixels on the long edge gives you control over the image’s final look while meeting the platform’s size limits.
Here are the four file sizes I use most and why:
- RAW Files: Straight from the camera, RAW files have the most information and the largest dimensions. These are perfect for editing but are too large for practical use elsewhere.
- Full-Resolution JPEGs: After editing, I save full-res JPEGs with minimal cropping for clients, printing, or stock photography. These range from 12MB to 30MB per image.
- Social Media Exports: For social media, I export at 60% quality, 2,000 pixels on the long edge. These files are around 500KB to 1MB, maintaining quality without being downsized by the platform.
- Blog Images: For blogs, speed is key. I export at 900 pixels on the long edge, compress the file with tools like ShortPixel, and aim for a final size under 100KB. While these may show slight grain or banding on desktops, they look great on mobile devices.
By tailoring file sizes to their purpose, you can maintain quality and optimize performance across platforms.
This is something that I really didn’t know or understand for a while, yet it is one of the biggest things I have learned.
5. Shoot in Raw
Photography is an evolution, constantly shaping how you see and create.
When I started seriously pursuing photography 10 years ago, I used a Nikon P300—a point-and-shoot camera with no RAW capabilities, only JPEGs.
Editing was limited, and with an outdated version of Lightroom, I was slider-happy going overboard—overexposing, over-saturating, and creating edits that seemed cool then but look terrible now.
When I upgraded to a Canon 70D, capable of shooting in RAW, I didn’t understand its value and stuck to JPEGs. RAW files felt unfamiliar and unnecessary. Once I learned that RAW captures the most information and allows detailed adjustments in Lightroom, I never looked back.
The biggest lesson, however, wasn’t just shooting in RAW—it was keeping my RAW files. Early on, I deleted them after editing, thinking my JPEG edits were enough. But as my editing style evolved, I found myself wanting to revisit old images to match my current style. Without the RAW files, I was stuck with outdated, baked-in edits.
Now, as a stock photographer, keeping RAW files is even more crucial. They allow me to re-edit older images for new opportunities, something I wish I had realized sooner during my early years with the Canon 70D.

6. The Edit
Editing photos is where creativity meets the eye of the photographer, and for me over the years, it’s become just as important as capturing the shot itself.
Great editing isn’t about overusing filters and presets, using every available feature in Lightroom, or making dramatic changes—it’s about subtle adjustments, knowing when to use what tool, and refining your vision.
I’ve learned to use the power of RAW files, bring out the true light and feel of a scene, and develop a unique style that feels authentic while keeping the scene how it truly was.
It’s not just about fixing mistakes; it’s about enhancing what the image is trying to say. Whether it’s tweaking the colors to match the genuine mood, cropping to focus attention, or balancing light and shadows, editing transforms a good photo into a great one.
Ultimately, the focus of editing lies in its ability to bring out the best in an image while staying true to the moment it captures.
It’s a skill that evolves with time, and the journey of learning and refining it has been one of the most rewarding aspects of my photography journey.
7. Presets
Presets can be both helpful and misleading, especially for new photographers.
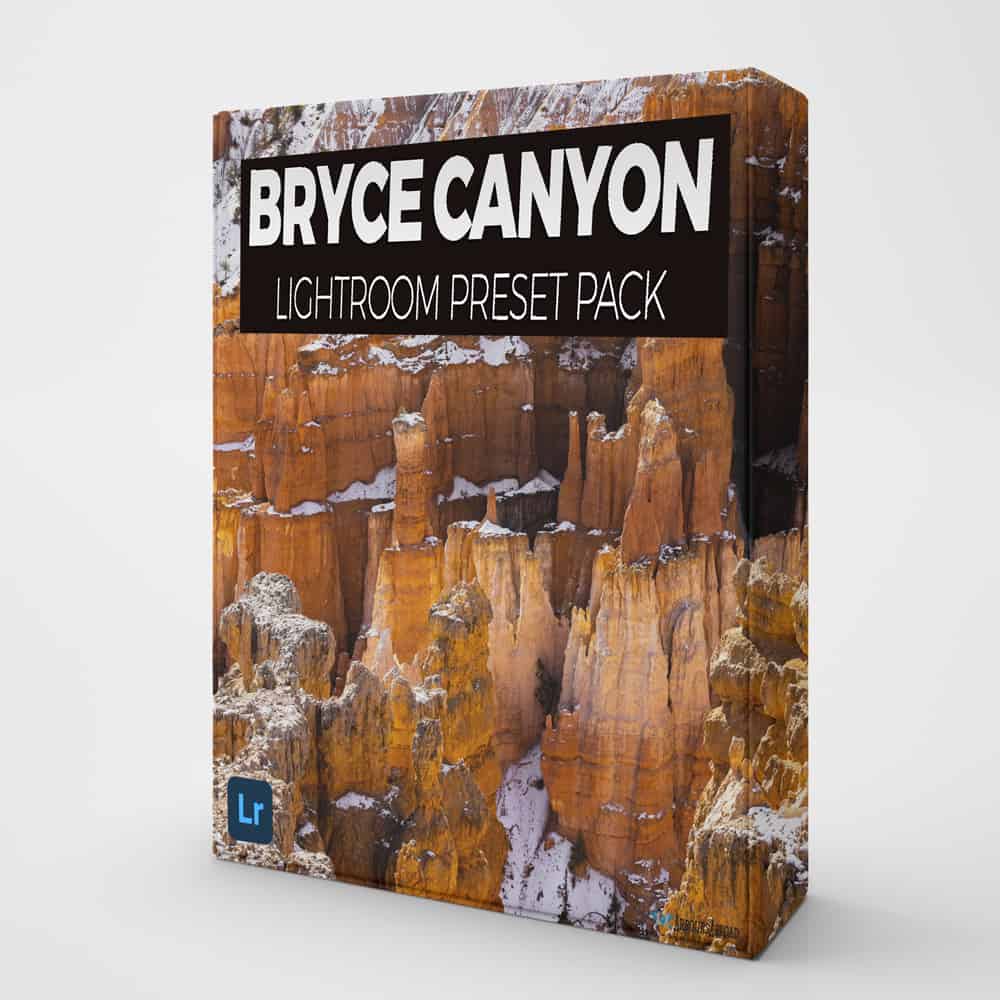
Early on, I believed that if I bought a preset pack from my favorite photographers, it would instantly give my edits the same professional look.
The reality?
Presets are tools, not magic solutions, and they work best as a starting point, not an end result.
The true value of presets lies in how they have the ability to teach you to understand the editing process.
By applying a preset and seeing how sliders and filters change, you can learn which adjustments affect specific aspects of an image. This knowledge helps you develop your skills and create edits that reflect your unique vision.
Creating your own presets is where presets can truly shine. Custom presets tailored to your style or specific needs—like family portraits or the warm tones of the red rocks in Sedona—can save time and ensure consistency.
They’re especially helpful for speeding up workflows and maintaining a cohesive look across a project or portfolio.
While presets are powerful tools, they’re not an end-all.
They should inspire you to learn and experiment, not limit your creativity or give you false expectations. Use them as a guide, but always aim to create something uniquely yours.
8. Equipment
One of the most important lessons I’ve learned over the years is that your equipment doesn’t define you as a photographer.
A great camera won’t automatically make you a great photographer. I started with a simple point-and-shoot camera, and those early days taught me that it’s not about having the best gear—it’s about understanding how to use what you have.
Your creativity, vision, and ability to showcase a landscape or a product matter far more than the latest tech.
With that being said, knowing when to upgrade your equipment is equally as important.
Upgrading isn’t about chasing trends or trying to keep up with other photographers; it’s about recognizing when your current gear is limiting your creative potential.
For example, when I realized my camera couldn’t shoot in RAW, it was time to invest in one that could. Similarly, upgrading to a lens that better fit my style of photography allowed me to capture images in ways I couldn’t before.
The key is to focus on mastering your gear first and only upgrading when it serves your goals. Don’t get caught in the trap of thinking more expensive equipment equals better photos. It’s your skills, experience, and artistic eye that make the difference.
9. Creativity
“Rules are meant to be broken!”
Yes, photography has its rules—the rule of thirds, leading lines, exposure curves, symmetry, and subject placement. These are invaluable guidelines that help create balance and structure in an image.
But some of the most striking photos happen when those rules are intentionally broken.
The beauty of breaking the rules lies in achieving a unique shot or capturing a look that resonates with your vision as a photographer.
Photography is an art form, and every photographer sees the world differently. What matters most is whether your photo communicates the story or emotion you intended.
Not every viewer will see your image the way you did when you captured it—and that’s okay.
Art is subjective.
There’s no right or wrong when it comes to personal style or creative expression. If your photo looks the way you wanted it to and reflects your vision, then you’ve succeeded.
That’s the beauty of creativity—it’s limitless, personal, and entirely yours to explore. So learn the rules, but don’t be afraid to break them when inspiration strikes.
10. The Lens
The lens you choose can completely change your shot, and each of mine serves a specific purpose.
My 14mm f/2.8 wide-angle lens is perfect for capturing expansive landscapes, vanlife interiors, or astrophotography. The wide field of view lets me fit more in the frame, and the f/2.8 aperture handles low light well, giving me sharp shots even without a tripod.
The 24-105mm f/4 kit lens is my versatile all-rounder. It’s great for travel and street photography, allowing me to switch between wide and tight shots without swapping lenses. While not the fastest lens, the f/4 aperture works in most situations and delivers good image quality.
The 100-500mm f/4.5-7.1 super telephoto lens excels for wildlife and distant landscapes. Its zoom range gives me the ability to get close to faraway subjects, with the lens’s compression creating dramatic, impactful shots. Though it has a slower aperture, the telephoto reach makes it invaluable for capturing distant scenes with clarity.
Each lens brings its own strengths to my workflow, helping me tell stories in different ways depending on the subject and environment. Knowing which lens to use makes a huge difference in how I capture and present the world around me.
What I’ve learned from these lenses is that each one offers different creative possibilities. The wide-angle captures the broad, immersive view, the versatile zoom lens offers flexibility for a range of scenarios, and the telephoto opens up distant worlds I wouldn’t otherwise see. Understanding each lens’s strengths has been key to expanding my creative vision and capturing the moments that matter most.

Professional Insight
The next three photography lessons learned all fit beneath professional insight because I believe they aren’t just something that can happen in one tutorial. They are an evolution that comes with years of practice.
These are just lessons that are constantly being learned to this day for me, as well!
11. Patience
One of the most important things I’ve learned from my professional experience is the value of patience.
Whether it’s waiting for the perfect lighting, the right moment, or the ideal subject, patience is key.
Sometimes, the best shots happen when you give yourself time to observe and wait for everything to fall into place.
Rushing often leads to missed opportunities and wrong lens choices, while patience allows you to capture moments that truly stand out.
12. Scouting
When you start out, you may not know what you’re even looking for. However, as you keep shooting, you’ll begin too see things you never saw before.
Scouting is a crucial part of my process. I know this isn’t always possible, but if you can, it always pays off!
Before heading out on a shoot, I try to take the time to scout the location, whether it’s virtually (Google Earth, social media) or in person.
Familiarizing myself with the environment helps me plan compositions, identify challenges, and spot hidden gems I might otherwise miss.
It also reduces stress during the shoot, which is a big thing for me, knowing I’m already prepared for different scenarios.

13. Keep Learning & Find Your Style
Photography is always evolving, and so should your skills. One of the most valuable lessons I’ve learned is to never stop learning.
Whether it’s experimenting with new techniques, shooting a different style of photography, mastering new features in my editing software, Lightroom/Photoshop, or understanding new gear, keeping up with the times and continuing to challenge myself has been key to growth.
Every day offers a new opportunity to expand my knowledge and refine my craft.
Over time, I’ve learned how important it is to find my own style.
It took a lot of experimentation and reflection on past photos, but once I found what truly caused me to get excited, my photography became so much better.
Your style reflects your perspective and vision, and it’s what sets you apart.
Finding it takes time, but once you do, it becomes a powerful tool that guides your creative journey.
Conclusion
Photography is a constant evolution, shaped by every trip out and every experience lived. It’s about more than just the gear you own or the perfect shot.
It’s about the process of learning, experimenting, and refining your unique view.
As it goes with our mantra for life and our business, Live Life Differently, photography facilitates this idea by teaching us to see the world through new lenses—literally and figuratively.
Embrace the journey, be creative, and remember that every mistake is a step toward mastering your craft. Keep pushing forward, and let your curiosity lead the way.
If you found these photography lessons helpful, be sure to subscribe to our newsletter for more tips and personal stories from our photography journey. Let’s keep learning and growing together!