ArboursAbroad contains affiliate links. As an Amazon Associate, we earn from qualifying purchases. If you purchase using one of the affiliated links, we may receive compensation at no extra cost to you. See our Disclosure Policy for more information.
When building out a van, insulating the van floor and really the whole thing for that matter is really important. By adding van floor insulation, you not only decrease the vibration and sound while driving, but you also lessen the heat transfer and create a warm place to stay in cold weather. We’re on our second van, this time really paying attention to the van floor insulation, and sharing the process as we go with you.
In this post, we’ll be talking about what materials to choose for your van floor insulation, how to actually install your camper floor insulation, and include video timestamps to each major step throughout the process of installing campervan floor insulation.
WHAT INSULATION TO CHOOSE FOR YOUR VAN FLOOR INSULATION
Direct Video Link to Choosing Van Floor Insulation Materials
Deciding on what material to use for your van floor insulation, and really van in general can be a daunting task. Luckily, we did the hours and hours of research for you. We watched countless videos, read numerous blogs, and researched insulation materials and how insulation actually works to make the best decision for not just our van, but for those reading and following our van build for their own conversions.
Instead of rewriting a post on something that’s already been brilliantly done by Gnomadhome, here’s a link to where we got a large portion of our information when deciding how to insulate our van. John goes into major depth with why you need to insulate and the science/engineering behind different kinds of insulation for your total van conversion.
He talks about the pros and cons of adding a water vapor barrier — which we did not do. Goes into detail about reflecting radiant heat and discusses loads of other van insulation materials — including the highly sought-after sheep wool insulation for the sides of your van.
Based on his blog and the other research we did, we went with Polyiso rigid foam board insulation. Because we’re converting a minivan and we are lacking the headroom most van conversions offer, we went ahead with specifically 1/2 Polyiso foam board. The R-Value (how well it insulates) is great for the amount of space it takes up.
If you have more space to give, go with a thicker Polyiso foam board, such as 1 inch or even 2 inches if you have space. Just keep in mind that you’ll also be adding a plywood subfloor and then actual flooring on top of that, increasing the overall “height” of your van floor.
We were able to find 1/2 inch Polyiso rigid foam board at Home Depot, a large, chain hardware store. The local businesses around us only carried 1 inch Polyiso insulation. Be sure to call around to see who carries what in your area, and support the small businesses if you can!
VAN FLOOR INSULATION MATERIALS + TOOLS
Direct Video Link to Van Floor Insulation Materials and Tools
When building out a van on your own, there are loads of materials and tools you’ll need for the total van conversion. Doing the van floor insulation on the other hand really doesn’t require too much. Each link below takes you to the exact product we used on Amazon. With that said, we didn’t actually purchase our products from Amazon but got them from our local hardware stores — but wanted to include the links so you can see the exact items.
We’re assuming here that you’ve already decided what insulation materials you’ll be using for the van, and are using the same van floor insulation material we did.. Polyiso rigid foam board insulation. The size of the foam board that you choose doesn’t have to be the same as ours, and it does not change any bit of the installation process.
Van Floor Insulation Materials
1/2 inch Polyiso Rigid Foam Board | get it here
Like we mentioned above, we decided to go with the half-inch rigid foam board due to the lack of extra space in our van. The half-inch foam board still has a great R Value per inch at 3.2. The R Value basically just tells you how well the material insulates the van. If you want a more detailed explanation for R-Values in general, head here.
Great Stuff Expanding Foam | get it here
Great Stuff Spray Foam is a total lifesaver. It works to fill in the ribs on the floorboard and is perfect for creating a total seal between the rigid foam board and the side/wall of the van. It also doubles as a sticky adhesive to secure the foam board to the metal flooring of your van. There are different types of spray foam cans, but this one was recommended on so many build-outs we read about, so we went with it!
Reflectix | get it here
While Reflectix isn’t great to use for insulating the main parts of your van. You’ll need some to insulate your wheel wells. When compressed against something, Reflectix loses its R Value, making it nearly pointless to use for insulation, especially for your van floor. However, since the wheel wells are rounded and just awkwardly shaped, Reflectix is the best way to insulate that part of the van.
Aluminum Foil Tape | get it here

Aluminum foil tape is the perfect tape to tape together the two foiled sides of your polyiso sheets. You’ll be using this to cover up any holes in the van floor, to connect the foam sheet seems, and to cover/connect the insulation to the walls of the van. The aluminum foil tape is also used to tape Reflectix to the wheel wells of the van.
Waterproof Sealer | get it here
Waterproof sealer seems like an unnecessary step to the van floor insulation, as you put aluminum foil tape over the holes in the van floor anyways. However, since you’ll be using waterproof sealer in other areas of the van build, like the holes you’ll put in your roof for a fan and solar, better safe than sorry with using it on the floor install too!
3M 77 or 3M 90 Spray Adhesive | get it here
It is debatable if you actually need to use spray adhesive or not. If we did our floor over again, we’d just stick to using the expanding spray foam as the way to secure the insulation sheets to the van floor. However, since again you’ll be using it in other areas of the van build, we recommend just grabbing some for the van floor insulation process as well. Again, one of those things where it’s nicer to have it than to not!
Van Floor Insulation Tools
Cordless Orbital Jig Saw | get it here
Honestly, if push comes to shove, you can do your van floor insulation without a jigsaw. However, it’s nice to have one for the long, straight cuts, as well as for the plywood subfloor in the van (used for protection of insulation sheets when letting expanding foam set). We have the Ryobi Orbital Jig Saw and it works great! We also found that using the jigsaw created less of a mess as opposed to the jab saw below.
Jab Saw | get it here
Who knew these things even existed?! We surely didn’t. And actually didn’t even know what the tool was called until writing about it now. When our grandpa found out we were doing the van build, he let us borrow his jab saw, and boy — it was our saving grace! A jab saw is the perfect tool to use for cutting Polyiso rigid foam boards! It also works really well for cutting off the extra expanding foam too!
Utility Knife | get it here
What DIY project doesn’t use a utility knife?! A utility knife is great for shaving off extra bits of expanding spray foam and for cutting the Reflectix when insulating the wheel well. It can also be used to cut the 1/2 inch Polyiso foam board if you don’t have a jab saw… honestly, not sure how well it would work on other thicknesses though.
Caulking Gun | get it here
A caulking gun will be used in both this part of the van build and when installing your solar and fan on your roof. If you don’t plan on using it a ton other than for the build, no need to get a super fancy and expensive one! Just grab a cheap-o one to get the job done!
Sharpie | get it here
A sharpie is nice to use because you don’t have to be as careful with puncturing the foam board. Especially when writing notes on the insulation. However, if you don’t have one at home, there’s no real reason to buy one. You can just use a regular pen instead — you’ll just have to be super careful not to poke holes in the board where you write!
Tape Measure | get it here
Small tape measures are game changers! We were literally fighting over the small tape measure throughout our entire build. Don’t believe me, buy one and see how much easier it is to use than the traditional big bulky ones!
Folding Saw Horse | get it here
Well worth the money spent to get a couple of folding sawhorses for your van conversion. These will come in handy not just for the van floor insulation but also for the rest of your build. If you can’t squeeze these into your budget, ask around.. maybe your neighbor or family members has a couple of sawhorses you can borrow!
Camper Van Floor Insulation Step by Step Guide
Direct Video Link to Van Floor Insulation Step by Step Guide
Alright, now that we’ve covered all the materials and tools you need for your van floor insulation project, let’s get into the step-by-step breakdown of how to actually insulate your campervan floor!
Step 1 // Clean Van Floor
If you’re starting your van conversion from a van that’s been previously loved, you’ll need to strip it to the bare bones and give it a good clean. Keep in mind, if the van already has sound deadening installed, you’ll want to keep that on the van floor!
*If pulling up carpet or old flooring, keep it in as much of one piece as you can. This works great for a stencil to cut out your van floor insulation.
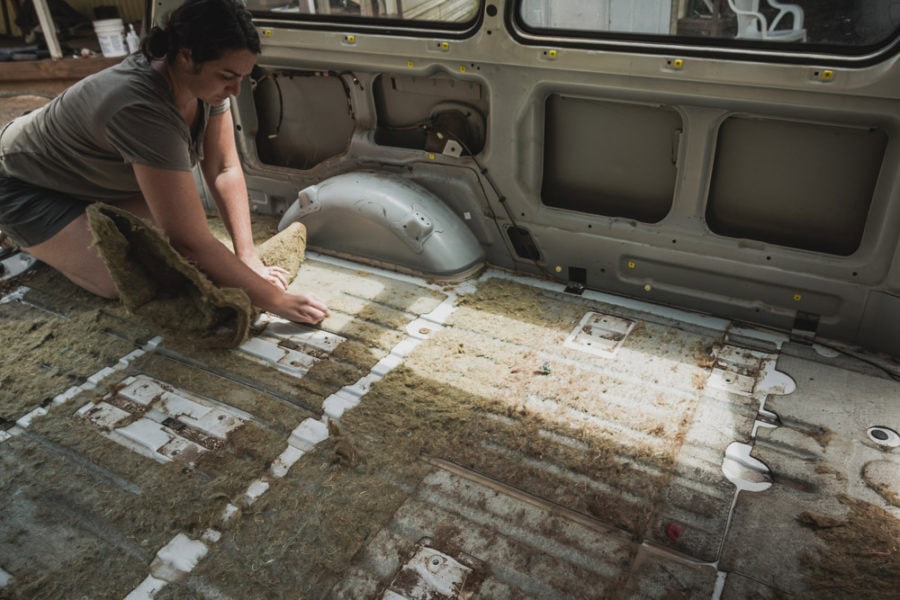
- strip out carpet and padding
- scrub floor with something abrasive, but not too abrasive (we used old slippers)
- treat rust spots with Rust-Oleum
- use silicone to fill any holes then cover with 3M Aluminum Tape


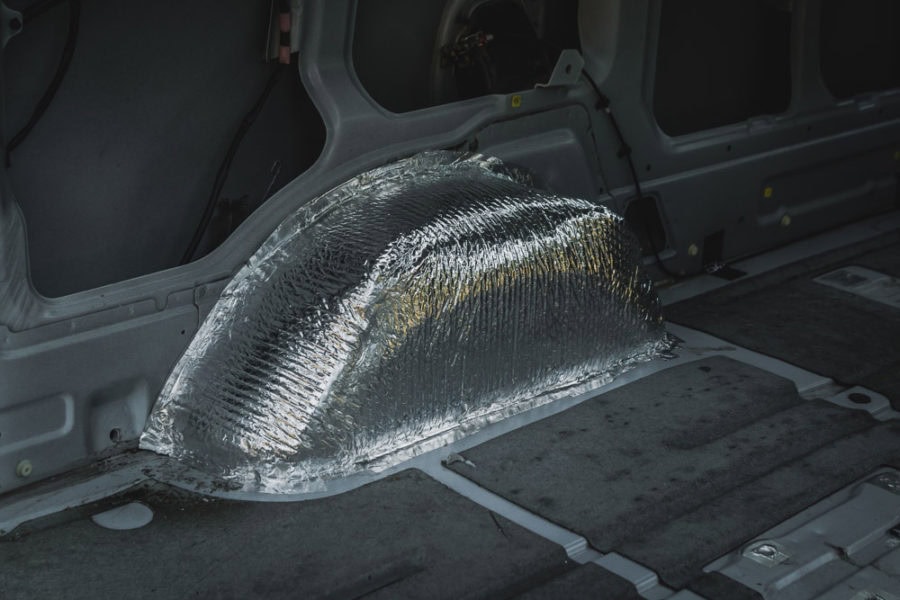
Step 2 // Insulate Wheel-Wells
Reflectix is what we recommend to insulate your wheel wells. Now, we don’t recommend using Reflectix for your entire floor insulation as the R-value drops without an air gap. However, for the wheel wells, it’s truly the best material to use with their super awkward shape! And, you’ll likely be covering them even more with a bench or bed, adding the extra insulation with all your van goodies.
- measure the length of your wheel well and cut Reflectix to size
- place Reflectix over the top of the wheel well, wrapping it down to the floor
- use an Exacto knife to cut the Reflectix to the correct width — don’t worry about the extra bits from the curve, you’ll cut this later
- use 3M aluminum foil tape and tape the Reflectix to the wall of the van.
- fold down and push against the side of the wheel well, then make a cut on the fold of the extra Reflectix
- tape down the sides of the Reflectix, then across the front
- cut off all extra Reflectix, leaving enough to just barely overlap the edge of the wheel well
- tape together the remaining Reflectix, and you’re good to go!
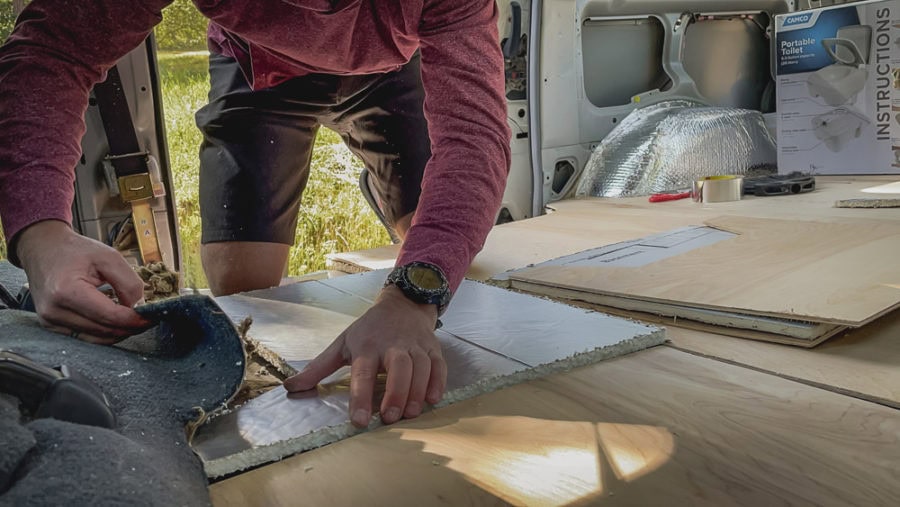
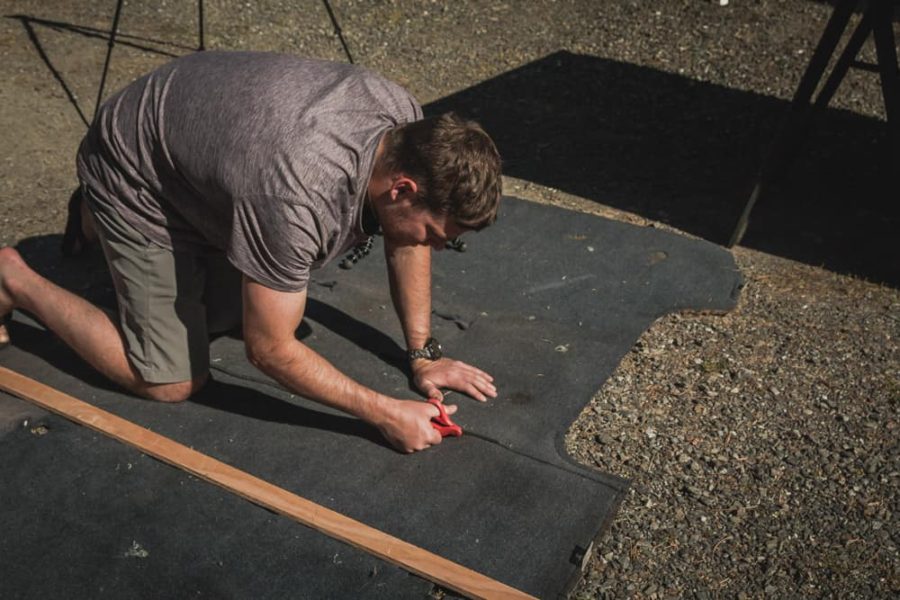
Step 3 // Cut Polyiso Foam Board Insulation
If you ripped out carpet from your van, this is where it comes in handy! Use the carpet as a stencil to trace and cut out your foam board insulation. Remember it doesn’t matter what thickness of foam board you use, this step will be the same regardless!
- grab your carpet stencil if you have one, otherwise, make a stencil using cardboard
- if you don’t use a stencil, and instead take your own measurements directly to the rigid foam board — don’t worry if you’re a little off, the spray foam will fill in any mistakes!
- figure out where to cut your stencil into pieces, if need be, to best suit the layout of your van
- in our case, the van is about 5 x 8, so we cut the stencil into two, four-foot sections
- trace the stencil onto your polyiso foam board… be sure to not press too hard, as you don’t want to poke a hole in the insulation
- use a jab saw or jigsaw to cut the insulation
- the jab saw works well for rounded cuts — the jigsaw is great for long straight lines
- check if the foam board fits — you’ll likely have to shave off a bit around the wheel-wells since you added Reflectix around them
- be sure to add all pieces of your foam board insulation to the floor here, making sure each piece fits snugly.
Step 4 // Recommended Step — Cut Plywood Floor
While this isn’t technically part of insulating your campervan floor, this step is super helpful to do right now. The plywood adds a bit of protection to your foam board insulation when applying weight in future steps.
We used 3/16 inch plywood for the subfloor in the van. Again, this was due to the lack of height in our minivan conversion. If you have space, doing a thicker piece of plywood subfloor would be super helpful! With the thicker piece of plywood, you can secure things like a bed, cabinetry, batteries, and the toilet to the flooring with a couple of screws.

- instead of using carpet for the stencil here, use the polyiso foam board cutouts, as these are cut to the exact shape and size of your campervan flooring with the Reflectix around the wheels.
- use a jab saw or jigsaw to cut the plywood
- honestly a jigsaw would be much more beneficial here, but if you’re on a budget and don’t have access to one, a jab saw will work just fine!
- lay the insulation back in the van, and then place the plywood floor on top, making sure it fits perfectly!
- you truly want to double, triple check that both the foam board insulation and the plywood subfloor fit in perfectly before you begin the next step — trust us, don’t make the same mistake we made!
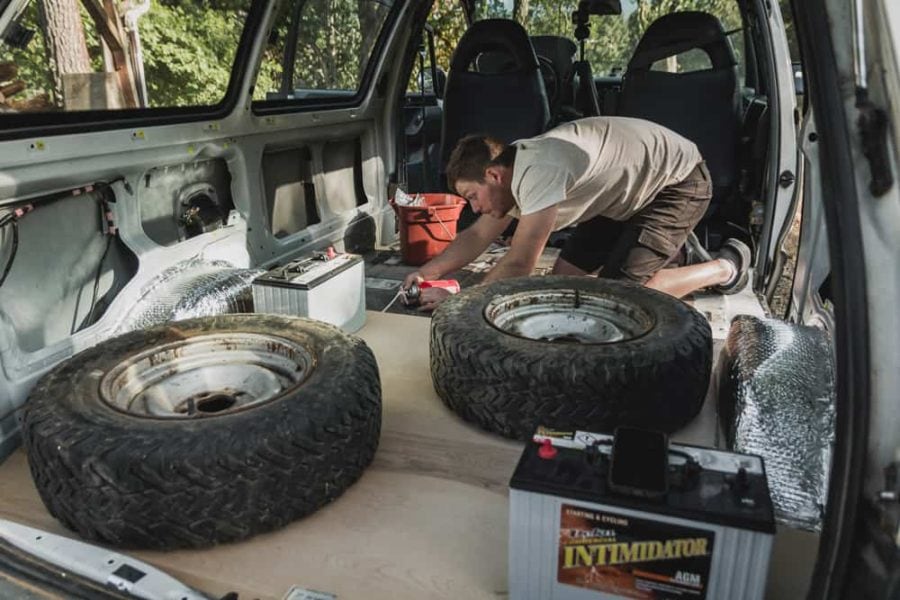
Step 5 // Glue Foam Board Insulation to Van Floor with Expanding Foam
After triple-checking that both the foam board insulation and the plywood subfloor fit in the van, you get to begin the fun stuff!! You’ll be doing this step piece by piece, so be sure to work your way through the van in a way that doesn’t trap you in a corner! Now’s a good time to gather all the heavy-weight objects you can find. Batteries, extra tires, bricks — really anything heavy works well here!

- remove plywood and insulation foam boards from the van
- open expanding spray foam
- fill in / spray the foam down the ribs of the back part of your van — covering only the space that one foam board cut out is (you’ll be laying them piece by piece)
- keep in mind the spray foam expands quite a bit, so you only need to do strips of spray foam down the ribs about half the rib wide
- lay the polyiso foam board insulation down, covering with the plywood subfloor
- press into place and add weight
- repeat these steps for each section of polyiso foam board insulation you have cut out
- put a pin or tack in the end of the spray foam sprayer to seal it from drying inside

Step 6 // Let Spray Foam Insulation Set for 8-10 hours
If you get this Expanding Spray Foam, the cure time is 8-10 hours. Hopefully, the timing is just right and you can let it cure overnight. Be sure to not jump ahead here, because you will need to fill the gaps and cracks, separately, after the foam boards are set.
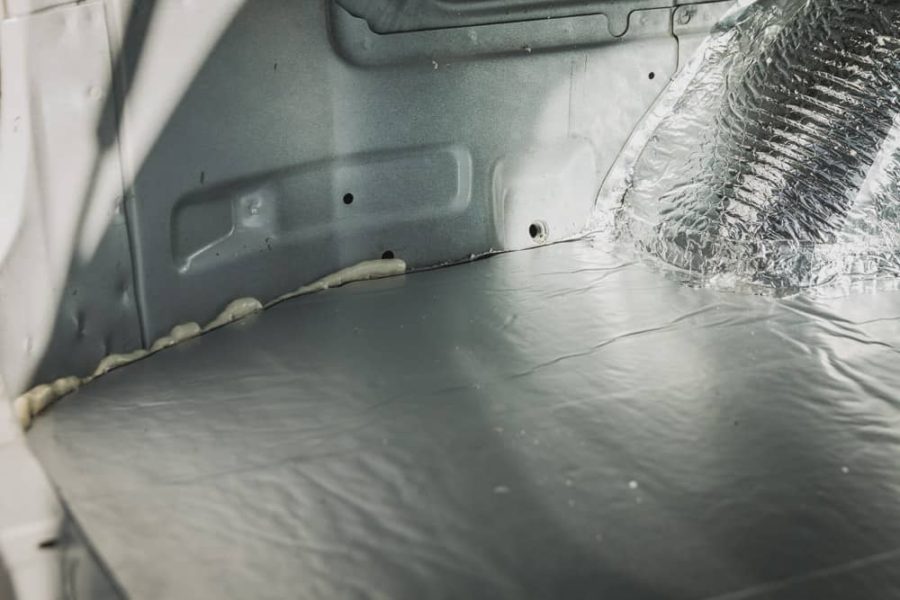
Step 7 // Fill Gaps and Cracks with Spray Foam
After the spray foam has cured, remove all the weight and plywood subflooring, then fill the gaps and cracks in the floor and let cure again. This made sound repetitive, and like a waste of time, but trust us here, it’s not. Use the spray foam as you used it to fill the ribs, but fill in all the remaining cracks. You shouldn’t be able to see any of the original van floor when you’re finished with this step.
We suggest using a piece of plywood to balance your weight when getting the hard-to-reach spots. Remember, the foam expands, and a little goes a long way here! Fill in the cracks along the perimeter of the foam board and anywhere they join together.

Step 8 // Let Cure Again for 8-10 Hours
Make sure nothing extra is touching the spray foam you just sprayed, and let it cure again for another 8-10 hours.
**Step 7 & 8 can be done at the end of a long day of working on something else in your van build, as it really takes no time to fill in the gaps and cracks, and you can’t do anything else to the van floor while letting the spray foam cure.
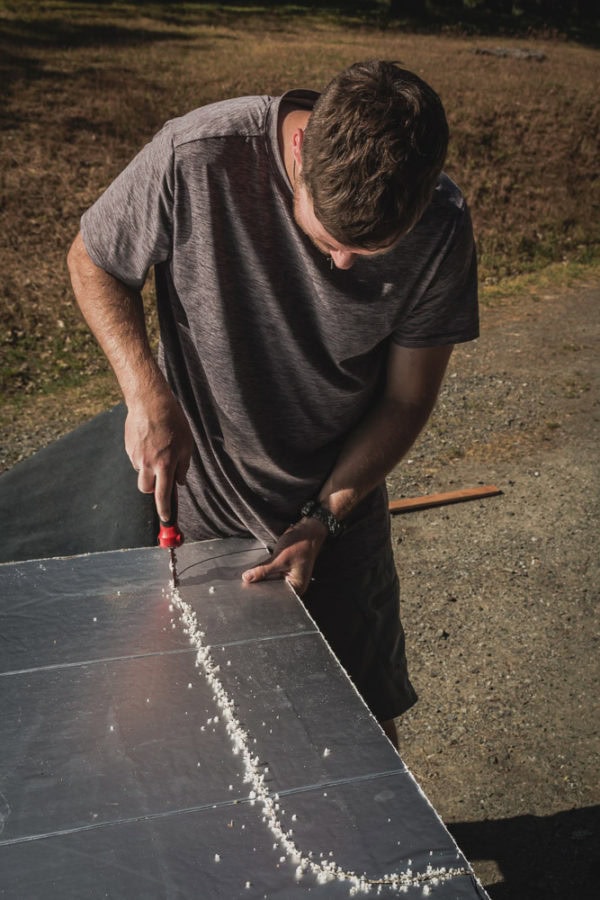
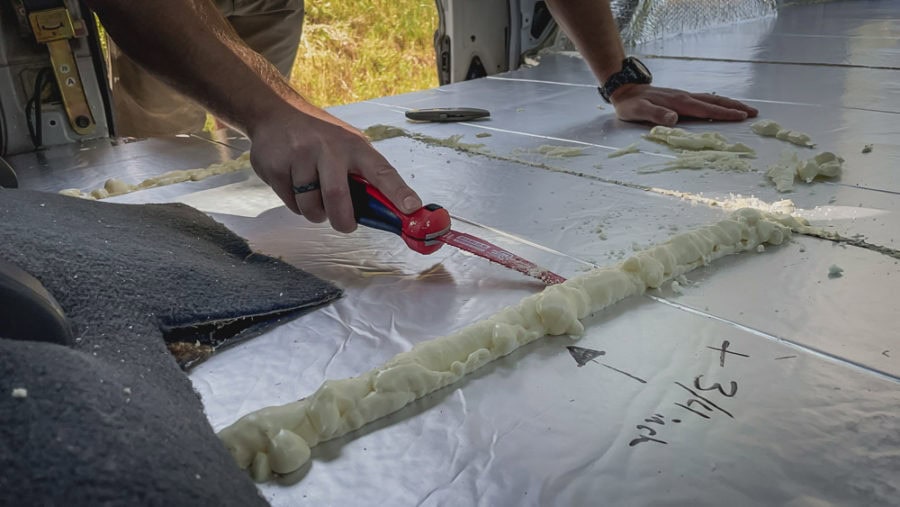
Step 9 // Shave Off and Tape Off
Now that the foam has expanded, you’ll have a bit of shaving to do. Use the Jab-Saw and Exacto Knife to trim off any excess spray foam. The spray foam shavings are messy and stick to everything. We found it best to use a microfibre towel to collect all the shavings.
- trim off extra Expanding Spray Foam
- wipe up the shavings
- use 3M aluminum foil tape to tape over the shavings and seams of your foam board insulation
- aluminum foil tape is super, super sticky! Do the taping in smaller sections, or you’ll waste a lot of tape.
Enjoy Your Hard Work
Wow, the end came up fast!! After you lay your last piece of tape down, you’re completely finished insulating your campervan floor!
Sit back and enjoy your new van floor insulation — that likely looks like a spaceship!!

More on Van Conversions + Vanlife
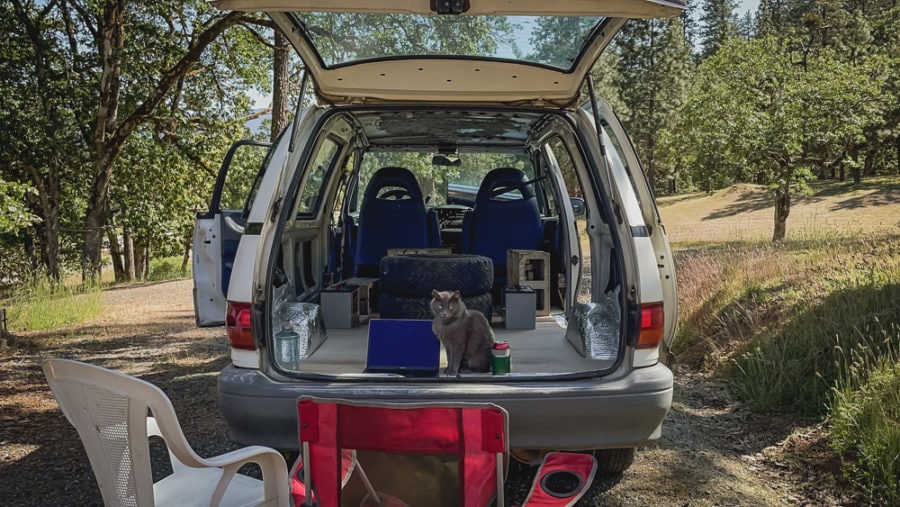
Follow along as we convert this 1992 Toyota Previa into a vanlife camper van. We will try to do this in the cheapest way possible. Yet also in the most practical, visually pleasing, and safe way we can.
The BEST Campervan Coffee Makers for Your Van
Choosing the Right Toilet For Your Van Build


