

When building out our minivan, one thing we were certain of was keeping as many windows open as possible. This meant that we would have to get super creative with how we converted the van walls. It wasn’t as easy as just putting up van wall panels and calling it good.
We had to consider framing all five windows, adding trim and a window sill beneath the windows for Georgie to be able to sit on, and then of course how we would create the support we needed within the van walls for the entire van build. And the sliding door… oh boy, that was a project. All that with loads of insulation behind, making certain our van doesn’t get too hot or too cold.
We decided to install insulation in the ribs of the van, and then screw in plywood panels into the frame. From there, we would use furring strips to frame out the rest of our van conversion. We didn’t mess with putting any of the van electrical system into the walls, as we were able to run it along the top of the van, right at the corner of the ceiling and walls. This made the van wall installation much easier!

This post contains affiliate links. As an Amazon Associate, we earn from qualifying purchases. If you buy through one of our links, we may earn a small commission at no extra cost to you. Read our full disclosure policy.
Minivan Camper Conversion Walls
Great Stuff Expanding Foam (4 bottles)
1-inch Polyiso Foam Board Insulation (2 sheets with extra for ceiling)
1/4 inch Beaded Plywood Panel (4 sheets)
1 x 3 x 8 (one board for under windows)
Plastic Covering Around Windows (original van plastics, painted black)
A Closer Look At Our Campervan Walls
Great Stuff Expanding Foam (4 bottles) | current prices here
Great Stuff Expanding Foam is amazing to use for the cracks and crevices of a campervan build. It’s perfect for a minivan in particular. We used polyiso sheet foam insulation for the main insulation in the campervan, however, could not have completed the project without Great Stuff Expanding Foam.
To stick pieces of sheet insulation on the walls, we used the spray foam, as it’s both the perfect glue and adds extra insulation. It was also perfect for filling in all the gaps and cracks, and areas that we couldn’t shove sheet foam in.
1 inch Polyiso Foam Board Insulation (2 sheets with extra for ceiling) | find them here
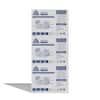
After loads and loads of research, we found Polyiso sheet foam board insulation to be the best option for our van build. It fit into our budget and was immediately available at our local hardware store. The R-value (how well it insulates) per inch is amazing for the relatively cheap cost of Polyiso.
Since the minivan doesn’t have straight walls, we had to cut the board into smaller pieces to fit the curvature of the walls. This is where the spray foam really helped out. The spray foam works as a glue to hold each piece of the sheet foam insulation in place.
If we weren’t on such a time crunch, and shipping wasn’t backed up with the Havelock Sheep Wool, we would have used Havelock sheep wool insulation to insulate the campervan walls instead of the sheet foam. It would have been easier to work with with the awkward shape of the minivan!
1/4 inch Beaded Plywood Panel (4 sheets) | check current prices here
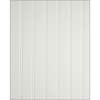
Honestly, I’m not 100% certain we would have used this style of plywood for the van walls had we not been given it. However, we were gifted some beaded plywood, and decided it would be great for the exposed van walls. We are super happy with how it turned out.
The beaded plywood makes the van feel homier. It’s perfect to use on only small sections in the van, as all the walls covered in this would be a bit much!
5 mm Plywood (1 4×8 sheet) | check prices here
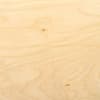
In our van build, and honestly, in most van builds, the majority of the walls in a campervan are going to actually be covered. There’s a healthy balance for using beaded plywood on the walls that are exposed, but the ones that aren’t showing really don’t matter much.
We used regular 5mm plywood for the van walls that are hidden behind the bed and cabinets. This plywood is not thick enough to drill anything into for structural support, however, we used 2 x 2 for the support, so that didn’t matter in our van build.
Self Drilling Metal Screws | find them here
Self drilling metal screws were huge time savers for our van walls. The van panels in our campervan are all held up by self drilling metal screws. We didn’t like the color of the self-drilling metal screws though, and instead wanted the heads of the screws to be black like the rest of our hardware, so we spray-painted the head of each screw black.
Spray painting the screws really ties in the final look of your campervan, and it’s really not that hard. Just stick the screws in a piece of cardboard, then spray paint all the heads… super quick and easy for a much nicer finish!
1 x 3 x 8 (one board for under windows) | check current prices here
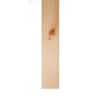
Okay, this part of our minivan campervan walls is totally scrapped together, but it worked out perfectly. Originally, we were going to use proper trim along the bottom of the window shelves. However, the trim we had wasn’t quite wide enough to cover all the metal we needed it to cover. So, we used a 1 x 3 instead. And honestly, we’re glad we did.
The final look, although not what we had planned, is in fact better than what we had originally thought up. And the 1 x 3 is the perfect size to totally cap in the plywood paneling while providing support to the shelf above!
Plastic Covering Around Windows (original van plastics, painted black)
When transforming our campervan into a minivan, one thing we’re so happy we did was saving everything we tore out of the van. This included every bolt, plastic piece, and even the carpet.
Originally, we were thinking our van would have nice wood around all the windows, perfectly framed creating a super homey feel. However, that just wasn’t a reality with the awkward curvature of the van walls. Instead of spending extra days if not weeks sorting out covers for around the windows, we just simply spray-painted the original plastics black. Creating a cohesive feel throughout the van.
Primer | check prices here
My favorite thing about using a primer is the quick dry time between priming and painting. Actually, I guess I have a couple of favorite things. Priming reclaimed wood with Kilz Primer kills and prevents future mold. It also is a great base to paint any color you wish on the wood.
When we primed and painted our campervan walls, we didn’t prime or paint the wood that would be hidden behind cabinets. We decided we didn’t want the extra weight, work, and maintenance keeping the wood white!
White Paint | grab some here
Sometimes I wonder what we were thinking having white walls in a campervan with a cat. Other times, I think it’s fabulous. I’m absolutely in love with the look of the white walls with the dark ceiling and countertops, though it does get dirty quickly… Especially with Georgie in the van with us.
The nice thing about paint is you can choose a paint that’s easy to clean. The satin finish is really easy to wipe down, so while it gets dirty kind of quick being white, it cleans just as quickly!
Our Camper Van Walls in Photos


More Details on Our Camper Van Walls
How to Screw Into Van Walls | video, pictures, and step by step guide
Step by Step, Start to Finish Guide on Installing Camper Van Panels for Walls
More Details on Van Builds
Campervan Coffee Makers | the best way to make coffee in the van
Doing Laundry When Living Life on the Road
9 Van Floor Installation Mistakes
5 Things to Include in Your Van Build if You Have a Cat
Vanlife Essentials | the best multipurpose things to keep in your van
Save and Share this Post With Others
Did you like this post on our camper van walls? It truly helps us tremendously when you save and share our posts with others! It’s a great way to show this post was helpful and we should write more like it in the future. Use these pictures to pin this post on Pinterest! Want to support us in a different way? Find out how here.

