

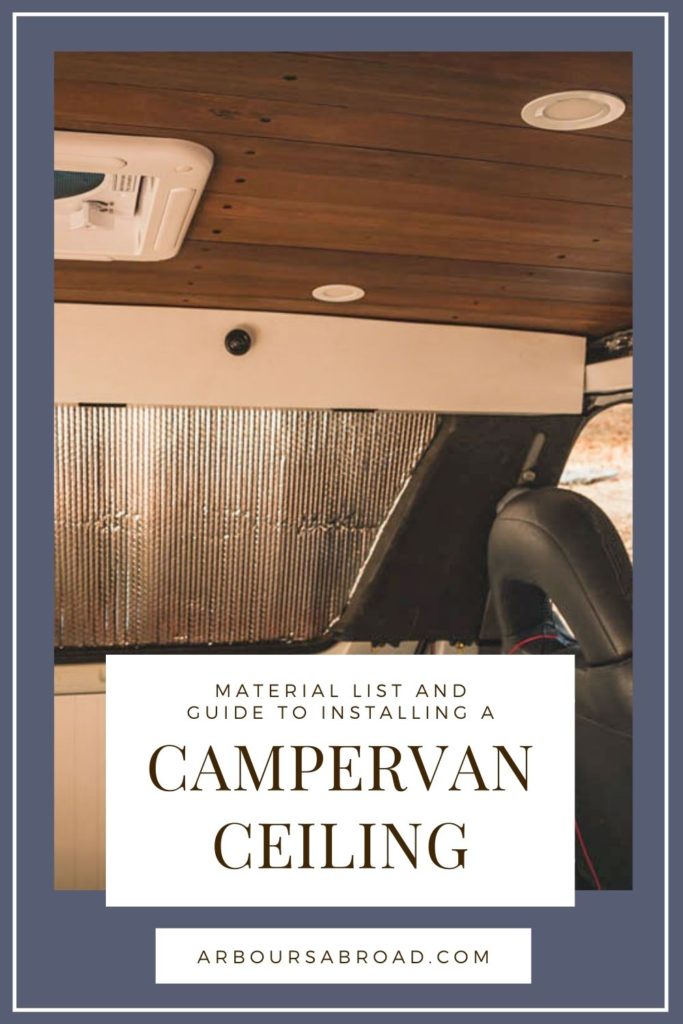
A campervan ceiling is oftentimes the thing that stands out in a van. The van ceiling truly brings together an entire build. And if done incorrectly, the ceiling can make a heck of a mess and stress later on down the road.
With our first sprinter van ceiling, we used plywood ceiling panels. We quickly learned the long cold winters in Scotland were not a place to have any exposed metal (aka the screws). And that idea carried over with us to our second van build. It’s insane the amount of moisture a camper van ceiling can hold. When you actually think about it, it makes sense though. All the condensation from your breath at night paired with all the steam from your kettle and cooking meals makes for a wet roof.
Check out these 5 camper van ceiling ideas to see what’s the best fit for you.
Not to add to the stress of worrying about condensation, but another key point we have to share, is thinking about insulation in the your camper van ceiling. The ceiling is where the most heat from the sun is going to come in, and where cold snow or rain on the roof will transfer cold temps as well. So it’s super important to properly insulate your camper van ceiling as well.
And then there’s the camper van roof vent. But shoot, that’s for an entirely different post… check out how to install your camper van roof vent here.
This post contains affiliate links. As an Amazon Associate, we earn from qualifying purchases. If you buy through one of our links, we may earn a small commission at no extra cost to you. Read our full disclosure policy.
Do These Things Before Installing Your Campervan Ceiling
You are probably at the ceiling stage of your van build because you have already completed your floors, addressed wall insulation & panels, and have installed your roof vent. However, if you haven’t already done these steps in your camper van buildout, I highly recommend you complete those phases of your build first and come back to this post when you’re ready!
Check out our complete video playlist on building out a campervan here first.
Alternatively, check out the following blog posts that go in-depth on our van build-out process.
Installing Campervan Floors | Insulation + Plywood Subfloor + Vinyl Flooring
From Concept to Completion | Installing Your Campervan Walls
Prepping Your Campervan Ceiling
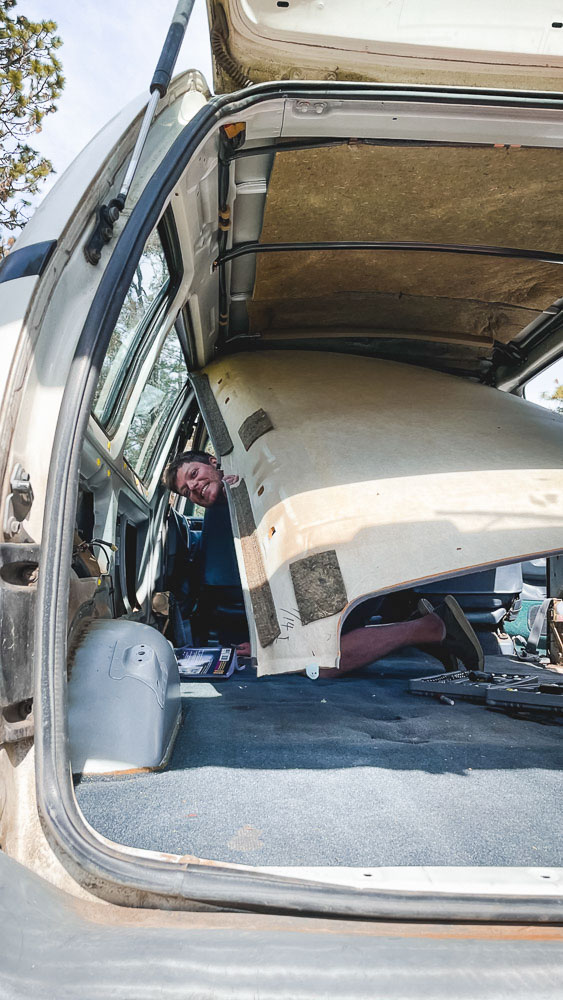
1. Rip everything off of your van ceiling
- Headliner, ac unit, oh sh*t handles, etc.
- If your van has a rear ac unit. You will likely not want it there for the van conversion.
- You must remove the freon according to local state and federal laws. Check what kind you have and dispose of it accordingly.
- Fortunately for us, our ac unit didn’t work and did not have freon in the system. So we could remove it without the spendy discharge service fee. We capped the system by going to a local pipe and hose fitting business to get proper fittings for our high pressure and low-pressure tubes to be capped beneath the van. (we will have an entire video on this process to come)
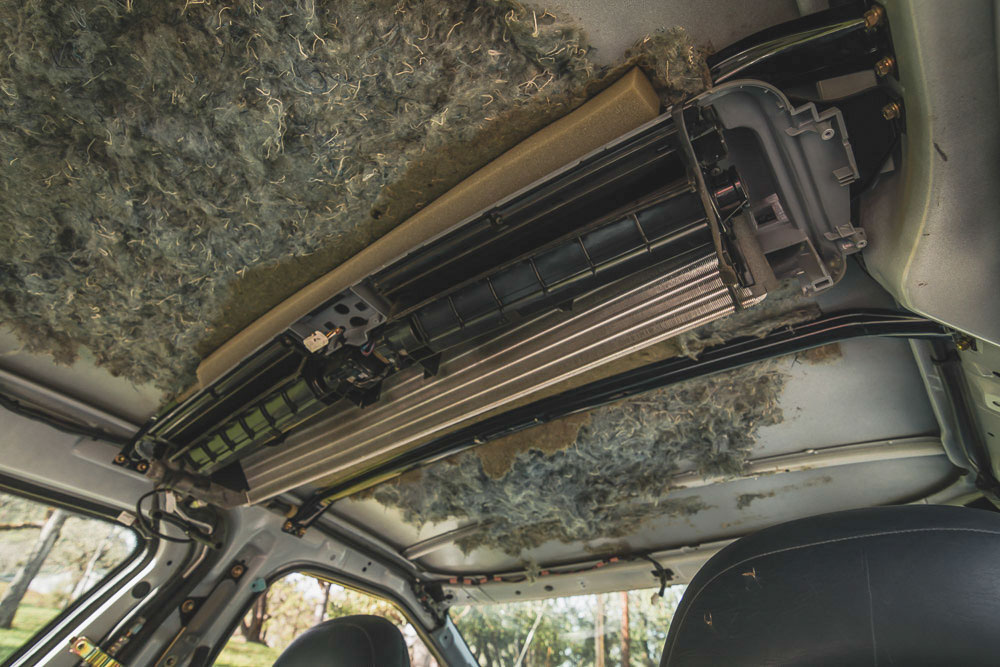
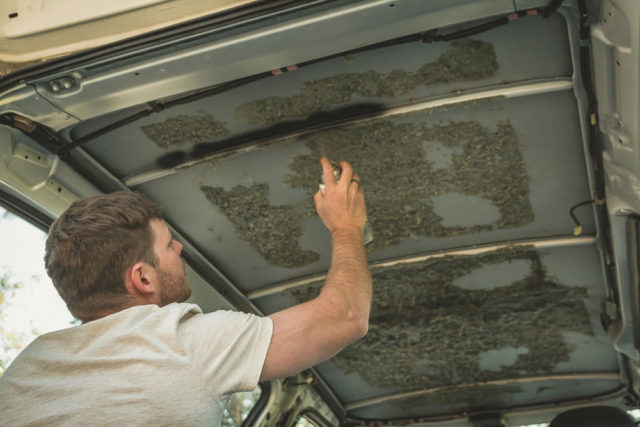
2. Clean the ceiling down to the bare metal as best you can.
- If you had a headliner that had insulation glued to the roof, it may be near impossible to remove completely. Construction adhesive is no joke!! You can see the residual of ours, but we didn’t mind with it being all covered in the end anyway.
- If there is that recycled fury stuff, don’t try to burn it, that was a bad idea! (check out the video for live clips of this)
- Use something lightly abrasive (we used slippers) to take the excess fur off

3. Treat metal with Rustoleum
- If rust is present or as a precaution in areas you think may rust to prevent it down the road, spray the metal with Rustoleum spray paint.
- In hindsight, we wished we sprayed nearly the entire van ceiling. This way, when things didn’t match up perfectly, specifically on the corners, then the metal would be black and blend it/look nicer that the white metal frame.
4. Install Your Roof Vent
Yes, I know I said to have that done already. But really, this is the stage where you want to install your roof vent. Obviously, you need the ceiling clean and clear before installing the van fan / vent.
You may be surprised the extra things you need to consider when installing your roof vent. Check out this post for an in depth installation of a camper van vent.
READ MORE | Choosing the Right Van Fan for Your Van


5. Complete all outdoor roof projects at this stage if you are planning on drilling holes in the roof and mounting things like lights, solar panels, or bike mounts.
- Make sure it is waterproof by spraying water all over it. Wouldn’t want to discover even the smallest of leaks after your entire ceiling has been installed.
- Leave the electrical wires from your solar panels, outdoor lights, and campervan fan dangling in the van at this point. You’ll be poking holes through your sheet foam insulation to run them through the ceiling after installing your ceiling insulation.


Insulating Your Campervan Ceiling
1. Insulate Ribs + Create Ceiling Planks Across Ceiling Ribs
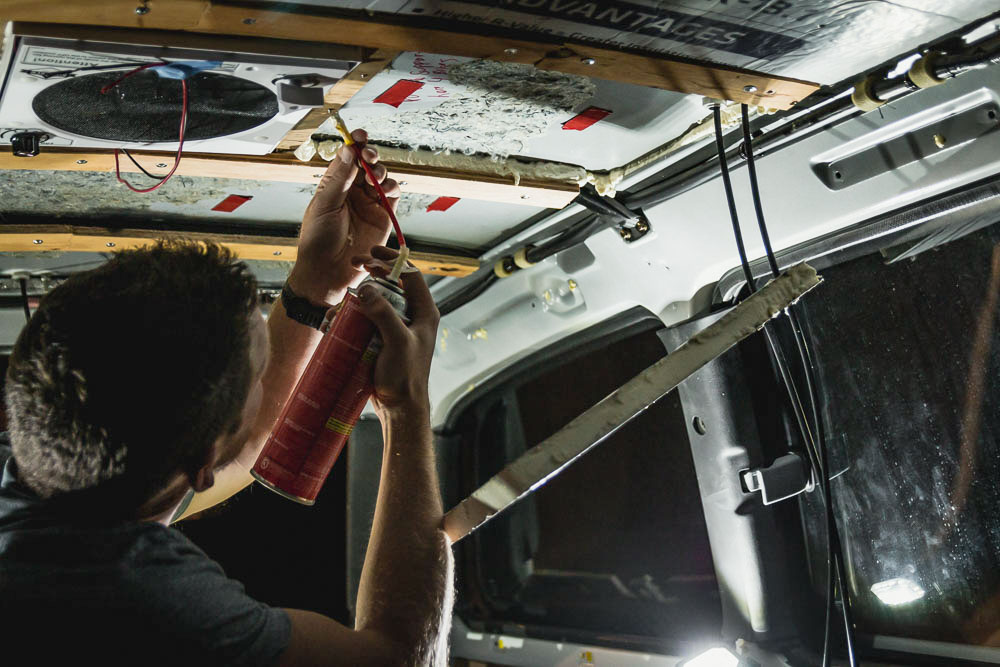
- Use Great Stuff Expanding Spray Foam and fill in the ceiling ribs of your van.
- Remember, the roof insulation is super important, and your insulation is only as strong as your weakest point.
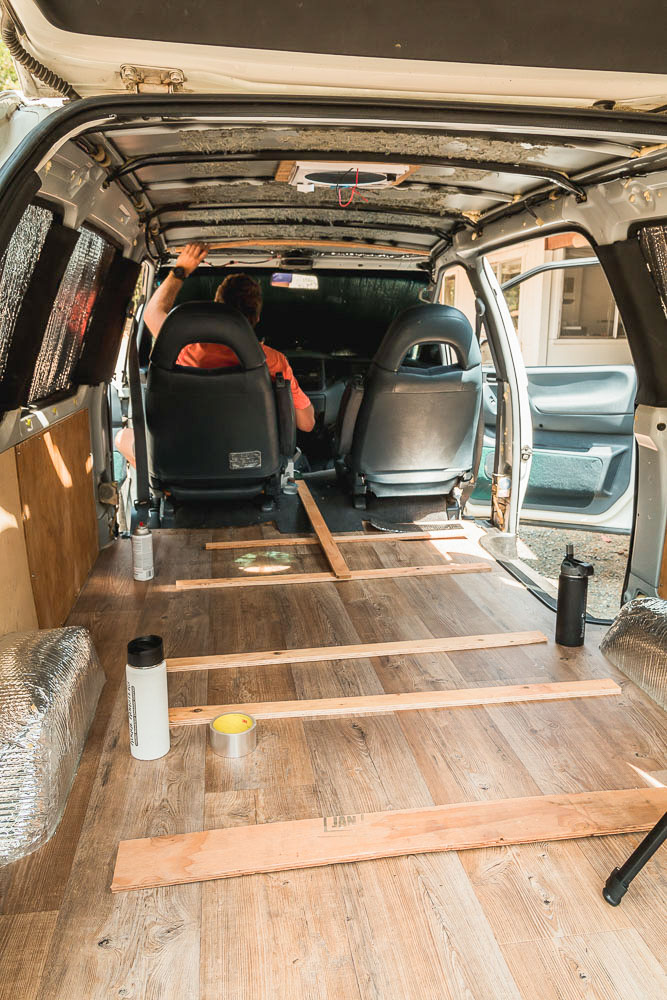
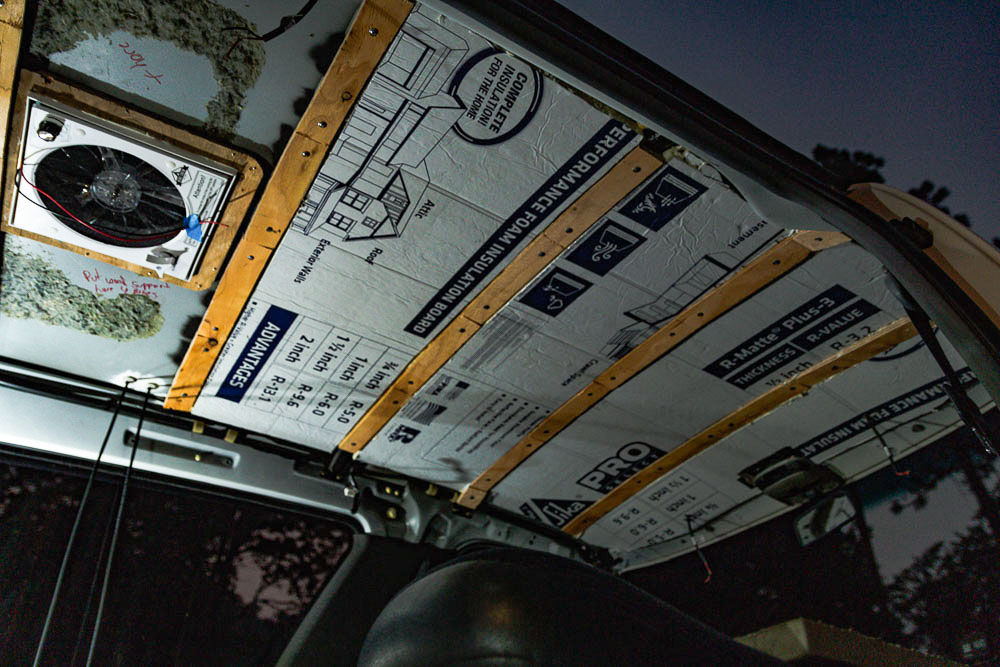
- Install furring strips, or plywood strips, for attaching your actual roofing.
- We used ½” plywood cut in about 2-3” strips. I thought the plywood would contour to the shape of the van, however, it didn’t. So I had to then cut it into four separate sections and string them together.
- Use two self-tapping metal screws to drill through wood and pierce the metal ribs of the van. If you are unsure how to screw into metal, check out this post and video on how to screw into your van.


2. Insulating your Campervan Ceiling
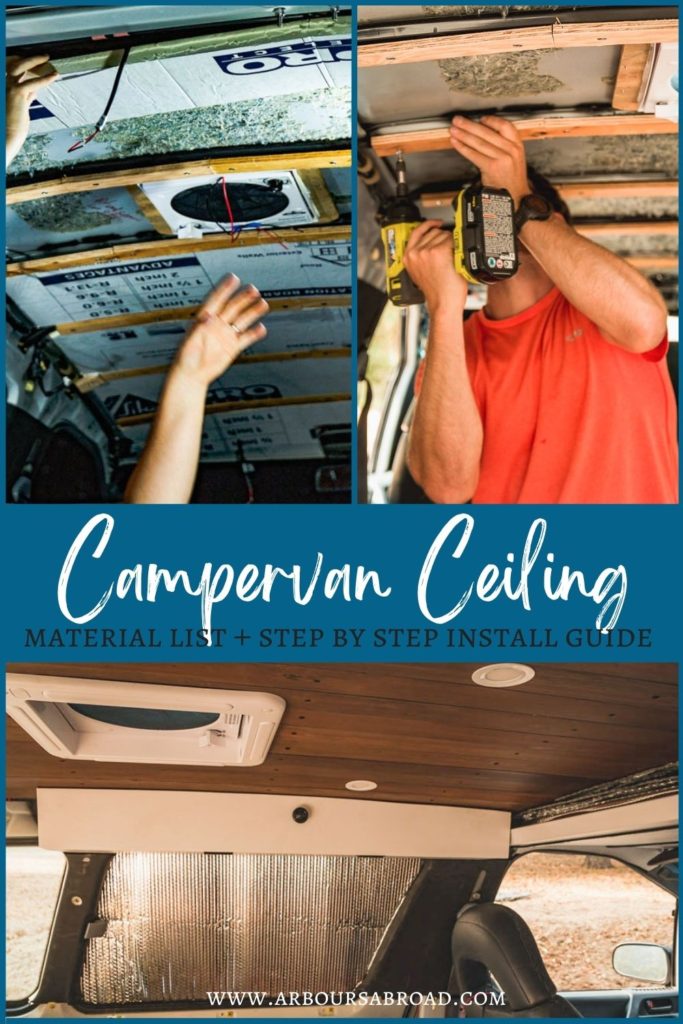
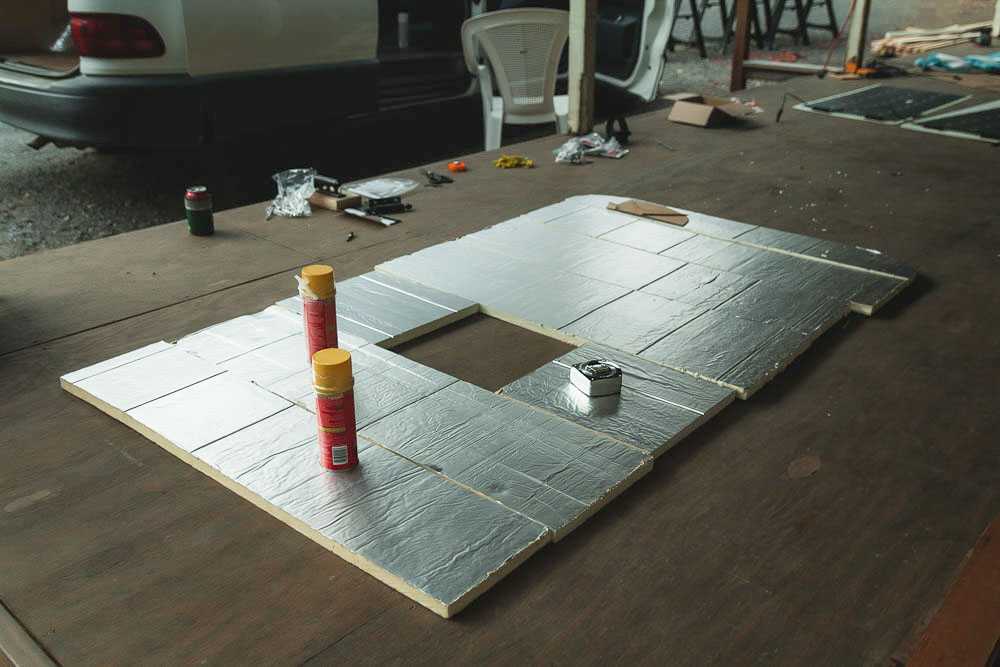
Polyiso Foam Board Insulation is a fantastic way to insulate your campervan ceiling. We used polyiso foam board to insulate our entire van, and it has worked really well!
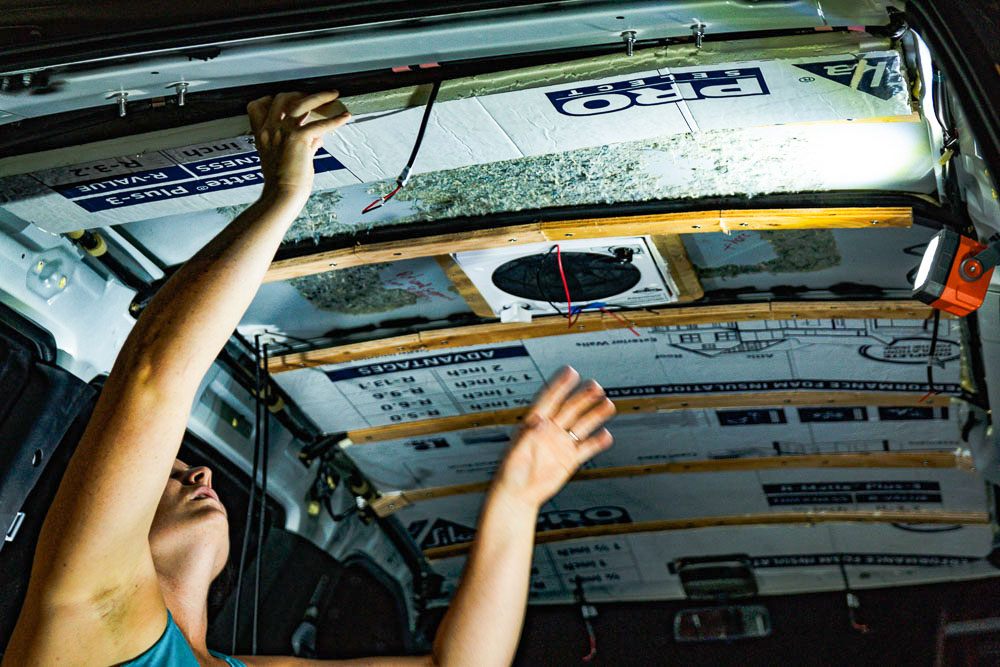
- We used 1-inch thickness because the thickness of the furring strips was 1/2 inch and the ribs themselves another 1/2 inch… making the entire thickness of the space between the ribs 1 inch. (this will make more sense in the pictures below)
- If you have more head space to give, you may want to go with a thicker polyiso foam board insulation, as the thicker the foam board, the higher the R-value (how well it insulates).
- Measure and cut polyiso to your specific dimensions required to fit between each firing strip rib.
- Secure in place by applying 3M double-sided tape to the ceiling. A few strips in each section are more than enough.
- To stick the polyiso foam boards to the tape, peel the backside of the tape, and just press in the area the tape is on the van ceiling.
- “Glue in” the insulation with Great Stuff Expanding Foam along the perimeter of the polyiso.
- Fill any gaps and cracks with Great Stuff Expanding Foam.
- Shave as necessary
- Let the spray foam cure for 12 hours
Electrical Wiring in Campervan Ceiling
Electrical wiring; this will be its comprehensive camper van build post later. However, for now.. here are the important bits to know.
1. Install Electrical Wiring in Campervan Ceiling
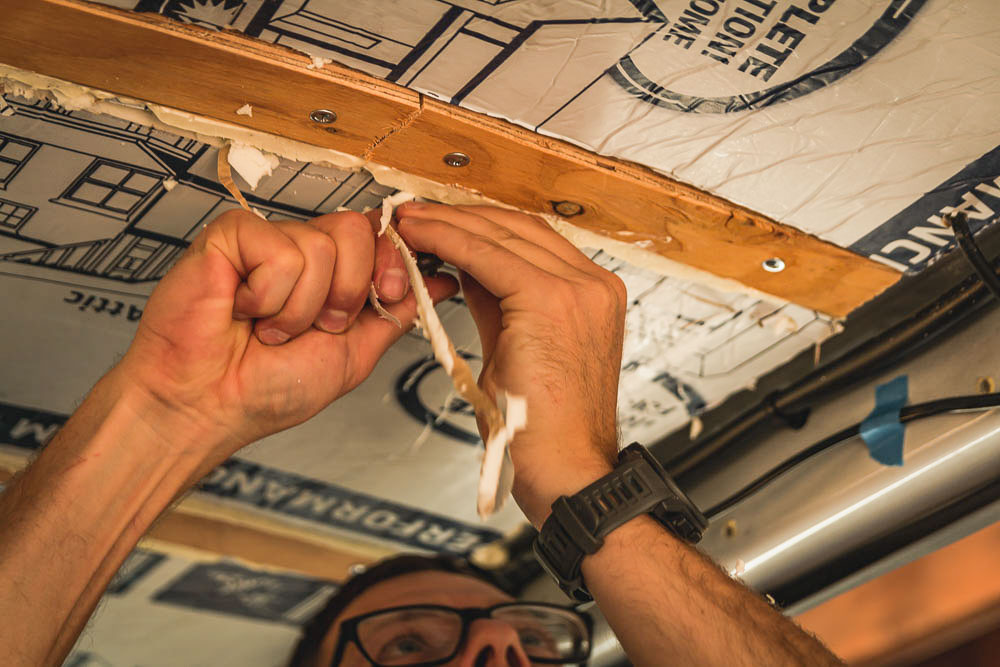
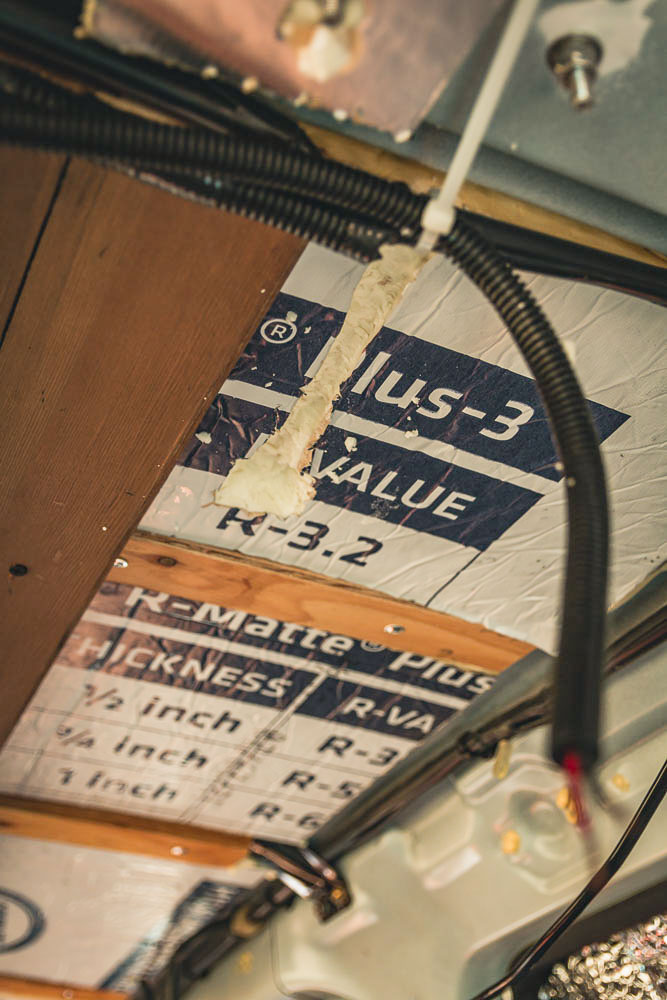
We did this part after laying insulation by cutting grooves in the insulation sheets.
This step is so much easier said than done. Be sure to check out the video on installing your campervan ceiling for more details and real footage of us running the electric wiring.
- Cut grooves in the insulation sheets only where you need the wiring. This is the best way to minimize any loss in insulation strength.
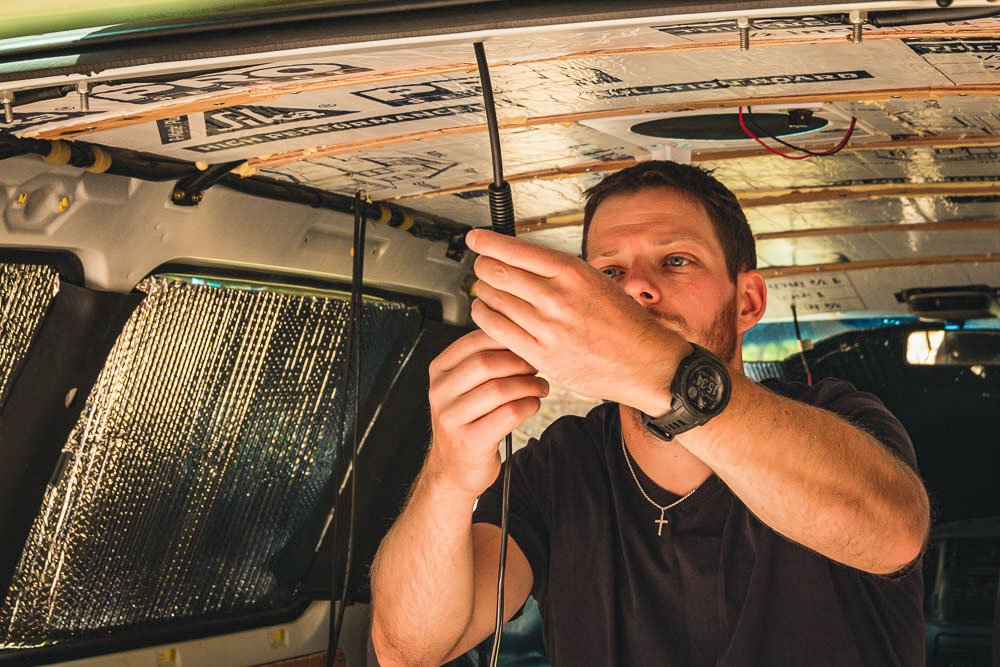
- Run wire for the camper van fan, where your lights will go, and run the wires for all the cables coming in from the roof.
- Run more wire than you think you’ll need, as you don’t want to be short any wire once you install the actual campervan ceiling.
- Use plastic conduit to protect the wires from pinching, any vibrations, and if we ever needed to add more, there would be a tunnel to push more wire through later.
- You can decide what’s the best way for you to run the conduit. Some wire we fished through the conduit before running the wires, and others we placed the conduit first, then fished the wires through. Honestly, how you choose to do this step is just what’s easiest for you.
Installing the Actual Campervan Ceiling
We were gifted old tongue and groove flooring that we repurpose into our campervan ceiling. Obviously, this took some time to prepare. We sanded it down, pulled out all the nails, and gave it multiple layers of stain to get the desired dark wood color for our van ceiling.
We absolutely love the final look of our cammpervan ceiling, however, we know it’s not necessarily the look for everyone. Check out this post for 5 different campervan ceiling ideas to see what ceiling idea suits your style best.
The following steps are for installing tongue and groove flooring as a ceiling. However, you can get the same basic idea for installing whatever campervan ceiling materials you decide by following along here.
1. Measure and Cut the Flooring to Correct Van Conversion Ceiling Length
In our minivan conversion, the roof of the van is a flipping egg shell shape. Meaning, there as absolutely no way to run the tongue and groove flooring the entire length of the van. We decided to only run it to just above the seats, and to the flattest part of the back of the van.
This idea reduced so much headache and frustration in the installation process. I reckon in more tradition camper van builds, you won’t have the egg shell shape to mess with. However, keep in mind that the frustration of making it perfect isn’t always worth it. Be open minded with how to install your campervan ceiling!
- With that in mind, only cut one piece of the flooring to size and see if it can bend and mold to the shape of your roof before cutting the rest of the pieces. You may have to change the design here.
- Measure and mark where you camper van roof vent sits on your ceiling. Use the flange of the roof vent (the inside cover) to set on your flooring layout in the next step, to see where exactly you need to cut the hole out of your campervan ceiling materials.
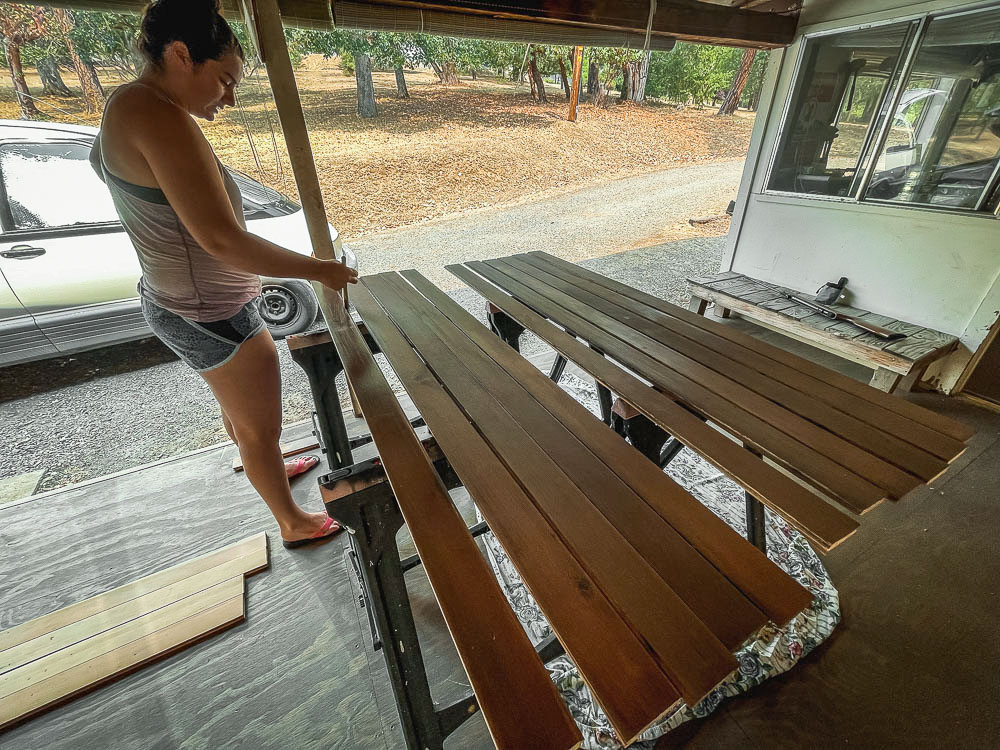
2. Lay Out a Trial Run of Campervan Ceiling Materials on the Ground
- Piece the campervan ceiling materials all together in a trial run on the ground. (in our case, this was the tongue and groove wood)
- If you have the pretty side of the ceiling material facing up on the ground, remember to lay it out opposite, as the wood will all be flipped when you install it into your ceiling.
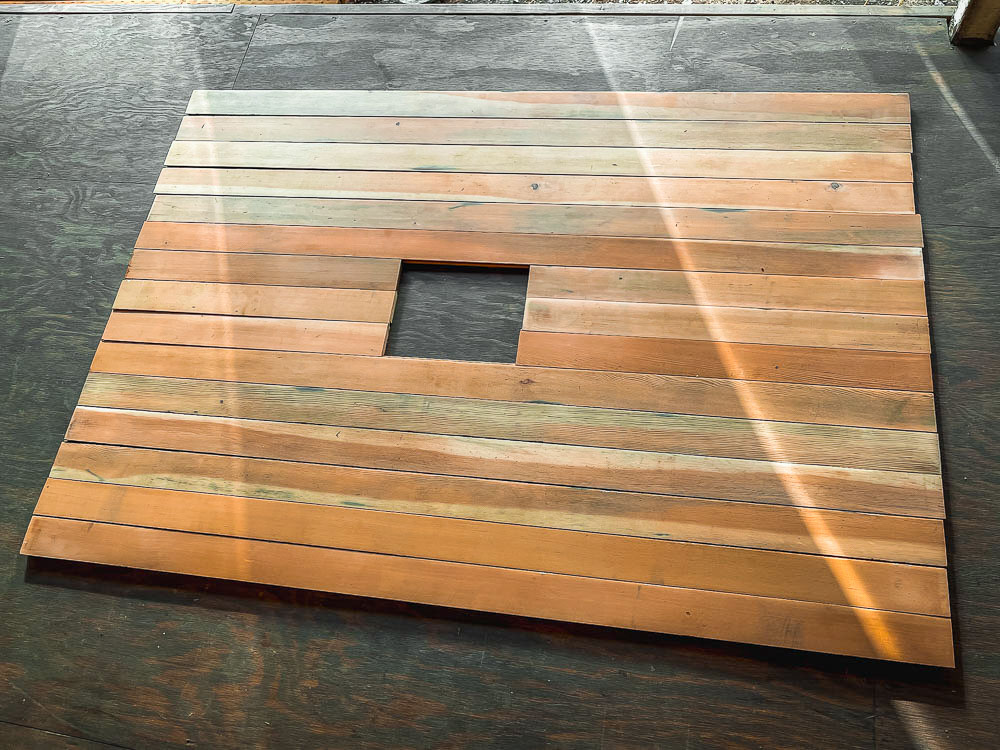
- Measure and cut the van fan into your ceiling material.
- Again, be careful here as the layout of your flooring is technically inverted if you have the nice side facing up.
- Use the fan flange to cut the perfect size hole for your campervan fan.
- Keeping in mind, the flange will actually overlay the edge of the wood, so you don’t have to worry about the cut edge showing.
3. Screw in the Campervan Ceiling Materials to Furring Strips
As you screw in your campervan ceiling material, keep access to your electric wiring. You may have to pull more wiring through the conduit as you install the ceiling materials. Don’t worry about pulling too much through the conduit, because once you connect the wire to the ceiling fan and lights, you’ll be able to pull the extra wire from the other end. You’ll want more wire to work with hanging from the ceiling than you think to make the connections to the lights and fan.

- Start on one side of your campervan, screwing in the first piece of wood.
- Pre-drill the wood to prevent the wood from splitting with the screw.
- We recommend using screws for securing your campervan ceiling, so if you need to do work on the van ceiling or roof, you can easily uninstall the ceiling materials.
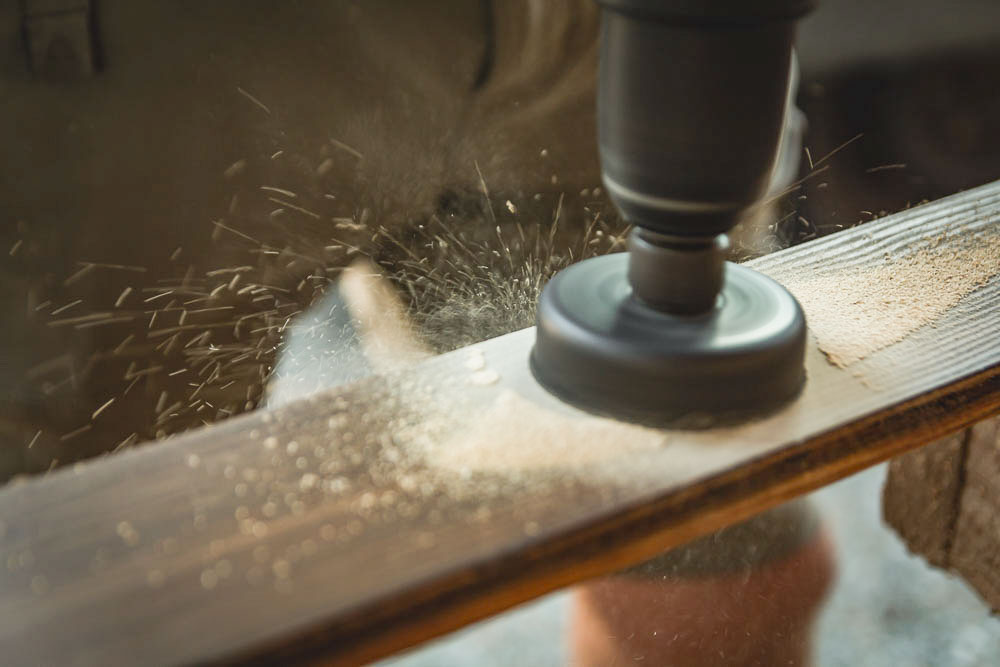
- Once you get to the board you want a light in, use this tool to cut a hole in the wood for your recessed ceiling lights.
- To make things easier, we installed the lights right in the center of one piece of wood. This just so happened to be centered in the van as well. I think we may have been lucky here. But keep it simple, and do the same!
- When placing your lights, consider what is going to be beneath them. Are they really in a useful place, or do you need to move them around so they’re over the bed for reading, or the counter for meal prepping?
- If using recessed campervan ceiling lights, drill the hole according to the directions listed with the lights. We installed 4, therefore 4 holes. We made sure to get the hole drilled on center and one board would have 2 lights/2 holes.
- Be careful with the wood strip as it becomes fragile after drilling the holes for the lights.
- Continue to move along the campervan ceiling, until you’ve installed all your campervan ceiling material.
4. You’re finished!!
Okay, obviously, you’re not done with the entire camper van conversion ceiling install, however, you’ve done the main bit. To tie up the loose ends of the ceiling, we recommend waiting till the end of your build. This way, you can still easily run extra wire where need be, and you will do less perfecting in places you may end up adding an extra cabinet or the like, covering up the edge of the campervan ceiling anyway.

At this point in our build, we ended up switching gears continuing with the rest of the build. One of the very last things we did was install the last cabinet along the back part of the ceiling. This was because we realized we really needed the extra storage space, and we seriously didn’t want to deal with the awkward curvature of the minivan roof.
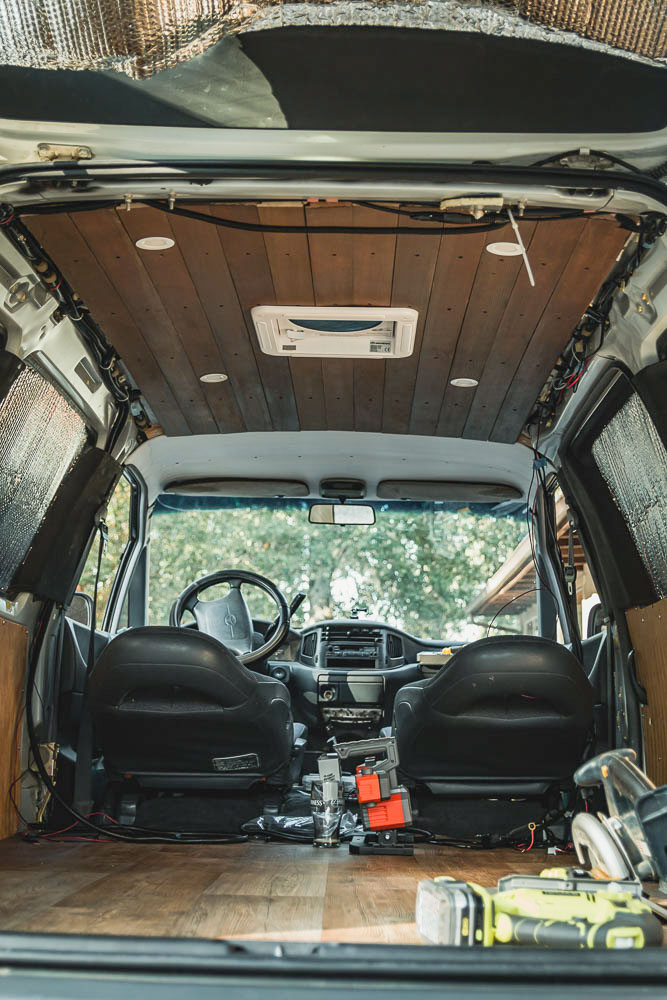
This is where it will be 100% dependent on what you choose to have in your van to determine the final steps of your van conversion ceiling. Will you have cabinets all around? Will the roof tie into the tops of the walls? Are you going to add trim to cover up corners and edges? Honestly, go with whatever looks good and is easiest!
What to do Above Your Driver’s Seat
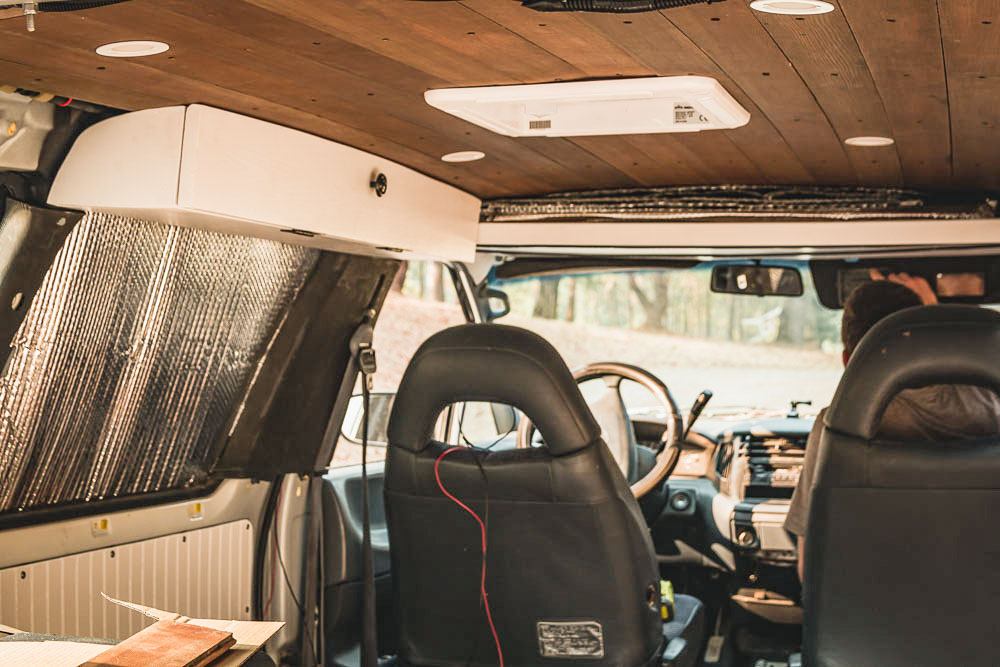
Depending on the height of your campervan, the space above the driver’s and passenger’s seat is valuable space. We took advantage of this space by adding in an extra shelf to store our Reflectix window coverings. However, this was so much freaking work and literally took more than 30 hours to build.
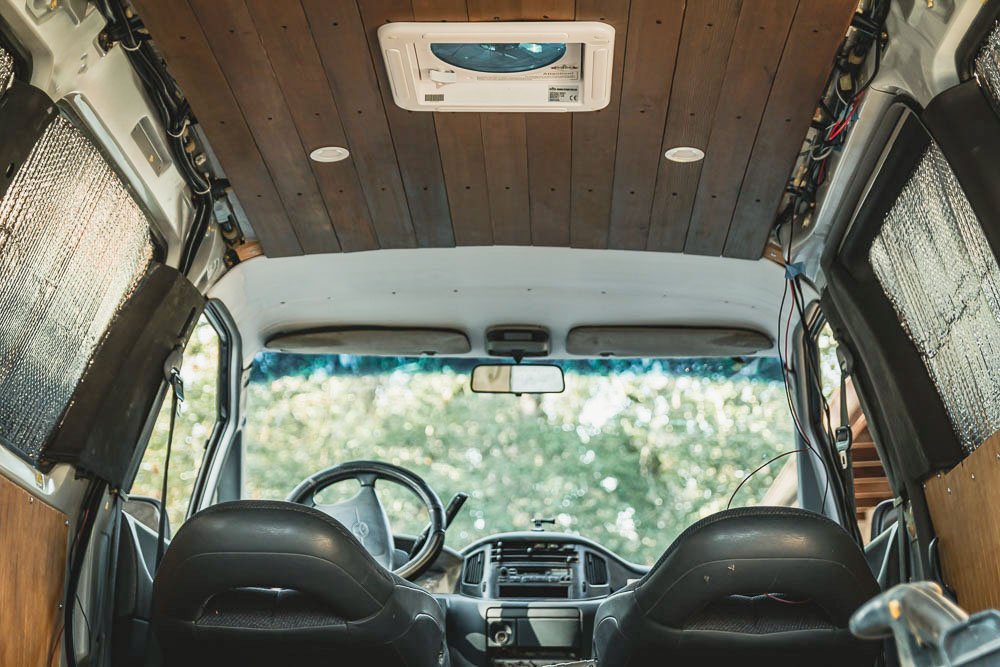
- Above the “cockpit” of the van, get crafty with the space. If you don’t have much space to work with, we suggest using a sheet of white corrugated plastic to cover and hold in place the insulation & wiring. It’s fairly easy to work with, lightweight and can be cut with scissors or an exacto knife. Hello, super easy way to finish your van ceiling!
- If you have the space for storage above your head when in the front seats, add a little shelf. Again, the corrugated plastic is great to use as the “ceiling bit” above the shelf, then get some plywood and a few l-brackets to make an easy shelf above your head!
- Be sure to consider what you’ll be storing in this above head shelf, as this will determine how strong you need the shelf to be. In our case, we would be using the shelf to store Reflectix, so we didn’t need the shelf to be super strong, so we just made a makeshift shelf out of random stuff we had around the house!
Campervan Ceiling Materials
Scotch-Brite Pad | find them here
If you find rust on your campervan roof, you need to treat it before continuing with your campervan ceiling install. To treat the rust, use a Scotch-Brite pad to scrape off rust chunks, then use the Rustoleum Spray Paint, listed below, to treat the rust.
Rustoleum Spray Paint | check prices here
Rustoleum Spray Paint is used in the campervan ceiling transformation to treat any rust that you find on your ceiling, as well as prevent any that’s to come. We recommend using this spray paint in any area you may be able to see after the camper van ceiling is complete.
Plywood ½ inch for furring strips | check prices here
While you can purchase actual furring strips to line the ribs of your ceiling to attach the actual ceiling materials too, we just cut strips of leftover 1/2 inch plywood we had at the house. Using plywood is a great way to save money if you have leftover pieces laying around! It’s also the perfect way to get a thinner piece of wood to use for the support instead of the traditional 1 inch furring strips.
1 inch Polyiso Insulation | check prices here
Polysio Sheet Insulation is the best bang for your buck as far as price to R-value ratio. (The R-value is how well it insulated per square inch). We used 1 inch polyiso because we didn’t have any extra space to give, and this allowed for the insulation to sit flush with the ribs and furring of the ceiling.
3M Double-Sided Tape | current prices here
Double sided tape is really used just for an added piece of security. It helps the insulation stay in place while the spray foam insulation dries. To be honest, this tape is pretty spendy, and we think if you’re on a super tight budget, you could probably go without using it. We only used it in a couple other areas of the van build, truly not enough use of it to make it worth the purchase.
Expanding Spray Foam | find it here
Great Stuff Expanding Spray Foam is used to insulate the ribs of the campervan ceiling that the polyiso sheet insulation can not insulate, and it’s also used as a “glue” to secure your sheet insulation to the ceiling.
Ceiling Material of Choice | check ideas here
In our second van build, we used old tongue and groove flooring that was gifted to us. In our first van, we used simple plywood paneling. There are lots of other options for materials to use for your campervan ceiling. In fact, we did an entire post on it. Check out five different materials for campervan ceilings here.
Stain | find it here
We went to a local hardware store and picked out a stain that we thought would be nice against the white walls and cabinets in the van. We were going for a dark brown look and kept that idea cohesive throughout the entire build, using this stain for any wood we weren’t painting. The end result is beautiful!
Home Depot offers loads of different options for stain, and you can even paint the ceiling too. We suggest using a waterproof stain though, so you can easily wipe down the ceiling.
Black Wood Screws | current price
Okay, so maybe these aren’t technically wood screws, but we really wanted black screws to match all our hardware, and these were what we found. They’ve held up really well for the six months we’ve had the van converted. We’ll update this post if anything changes though. For now, we can fully recommend these screws for installing the tongue and groove flooring for your van ceiling, as they get the job done and look nice!
Self Tapping Metal Screws | grab some here
These self tapping metal screws are used throughout your entire van build. However, for the campervan ceiling, you’ll only need them to attach your furring strips to the ribs of the van roof. Buy a big box though, as you’ll use them when installing your campervan walls and things like L-brackets, and conduit loops as well.
Plastic Conduit | check prices here
Plastic Conduit isn’t necessarily part of the actual campervan ceiling materials, however, it does go into your ceiling to run all your electrical wires so we wanted to include it here. You’ll need this for running all the wires in your van, so be sure to purchase enough for your entire van build, not just the ceiling.
Van Conversion Ceiling Tools
Circular Saw | current price here
If you’re on a tight budget, you can certainly get the job done with a jig saw, as we link below. However, a circular saw is SO NICE to have throughout the entire van build. It makes cuts a lot more clean and quick. And is perfect for making long straight cuts on any wood.
Drill | find it here
We recommend purchasing this drill driver combo set. Again, you’ll be using this set for all areas of the van build, so it’s a good, cheap investment when building out a campervan!
Jig Saw | grab one here
When installing your campervan ceiling, you’ll need to cut out a square for your campervan fan. A jig saw is the perfect tool for this job. Don’t worry, you’ll using this tool at many other points in your van build too.
Impact Driver | you really need a set!
An impact driver is a major game changer in a van build out. It takes off some of the muscle power you need when screwing wood together. It also ensures a much tighter connection than a regular drill. Get this set and thank us later! Trust us, your arm muscles will be grateful!
Sander | current prices here
If repurposing old wood for your campervan ceiling, you’ll certainly need a sander to sand down the wood for a nicer finish. This sander isn’t the best on the market, but it worked really well for our needs. And it comes at a pretty cheap price compared to other sanders.
We tried using a battery powered sander, and in our opinion there wasn’t enough juice in the battery to really get the job done effeciently. So we recommend using a sander that plugs in like this.
Don’t forget to grab some extra sand paper too. We finished ours with 120 grit, and it turned out super smooth!
Hole Saw Kit | grab it here
Oh my goodness… this hole saw kit saves the day when needed to cut a precise hole in the ceiling materials for recessed lights. At first, we didn’t know how we were going to cut the light holes, but then remembered we had this nifty little tool!
When using the tool, cut with the nice side of whatever campervan ceiling materials you use facing up to prevent any splintering on the seen side of the campervan ceiling.
Box Cutter | check prices here
A box cutter is the simplest way to cut the polysio sheet insulation (the insulation you’ll be using for your campervan ceiling). A box cutter also works when cutting the conduit, and the corrugated plastic that you may or may not use for above your seats in the front cab. This tool will also come in handy when removing the headliner in your van.
Shop Vac | check prices here
When we started our van build, we didn’t have a shop vac. Then our sister and brother in law gave us one they didn’t want any more… and holy smokes, I don’t think we could have finished the van build without one. A shop vac obviously vacuums up all the mess, but this is particularly useful when drilling and cutting metal — as the shavings if not cleaned up, will cause rust.
More Details on Campervan Conversions + Van Life
How to Install Camper Van Wall Panels
Fun and Practical Gadgets for Campervans
A Complete Flexible Solar Panel Kit
A Full Run Down of Campervan Coffee Makers
Save and Share This Post
It truly helps us tremendously when you save and share our posts with others! It’s a great way to show this post was helpful and basically gives us a virtual high five. Use these pictures to pin this post on Pinterest!
If you have any questions on your van conversion ceiling.. let us know!