Campervan Slide Out Bed | Our Minivan Camper Conversion
ArboursAbroad contains affiliate links. As an Amazon Associate, we earn from qualifying purchases. If you purchase using one of the affiliated links, we may receive compensation at no extra cost to you. See our Disclosure Policy for more information.
After having to make the bed in our first campervan every single day, we promised ourselves we’d have a full van in our next van build. But here we are, with another campervan slide out bed in our second van.
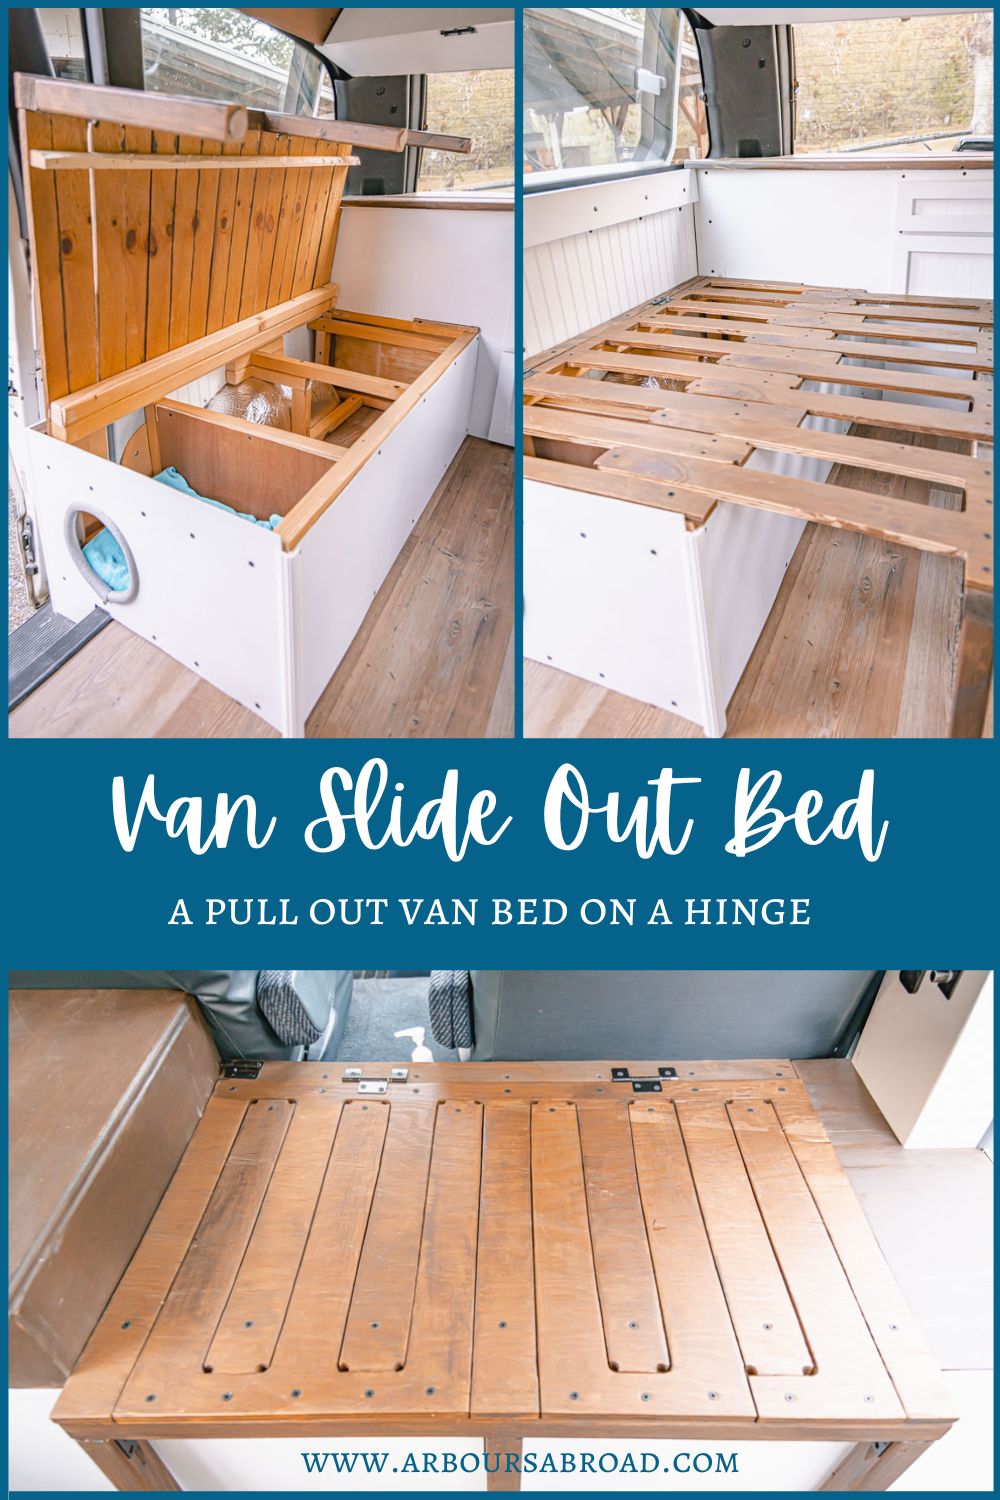
We’re giving ourselves grace with that though, as we converted a minivan into a campervan, so there truly was no room to have an entire normal-size permanent bed in the van. Our campervan slide out bed has two different pull-out sections, each on a hinge for easy access to the storage below the bed. They also make for great bench seats when not in use. And while we’d love to have a memory foam mattress in our van conversion, that will have to wait until we do van life in something bigger like a ford transit or the like.

The Bed in Our Minivan Camper Conversion
Outdoor Furniture Cushions (cheapest option and cute!)
Thick Cozy Blanket (for covering cushions when sleeping)
2 x 2 x 8 “Furring Strip Board” (for leg support and framing)
Waterproof Stain (semi-transparent tint based with coffee color)
5 mm Plywood (for bed storage face)
A Closer Look at Our Campervan Slide Out Bed
Outdoor Furniture Cushions (cheapest option and cute!) | grab some here
With the super awkward shape of the van bed, we had a few different options for the bed mattress. However, after looking at foam padding, we knew we wouldn’t go that route with how spendy foam is. Instead, we loaded up on regular outdoor furniture cushions and used that for our bed.
The major bonus to these is the fact that they’re super cute just as is. They make the bed feel more like a couple of couches in the van instead of just bed cushions when not in use. A huge downside to these has been the lifespan. We’ve found that they have really flatted out since our inaugural trip in the van, and have actually added a couple of floor mats under the cushions to make for a more comfortable sleep.
Comforter | find yours here
While we would love to have just a down comforter that’s super compact when not in use, that’s just not the reality when living in a van with a cat. Instead, we grabbed a cozy large comforter, and use it as our top layer, and in the warmer temps the only layer of blankets on the bed.
With a couple of homemade buckle straps, this blanket rolls up super nice and easy.. and again, in our opinion looks cute out on the wooden seat.
Down Blanket | grab one here
Hitting the road, we actually didn’t pack a down blanket originally. However, after a couple of nights in freezing temps, we knew we had to get one. Down blankets like this are so nice because they don’t take up much space when not in use, and they’re extremely warm.
We will say, they’re not as cozy, so it’s nice to have an extra blanket, like the one above for the top layer of our bed.
Thick Cozy Blanket (for covering cushions when sleeping) | current prices here
Instead of having a sheet in the van, we use an extra-thick, cozy blanket to cover up the bed cushions at night. This keeps the bed cushions clean, while also adding and extra layer of warmth to the bed.
A thick blanket helps tremendously in preventing cool air from seeping up through the edges of the cushions. In the warmer temperatures, we have just a sheet covering the cushions when the bed is made, instead of a thick, fleece blanket.
Hinges (four) | snag some here
Each section of our minivan campervan bed is on a hinge. Having two hinges per section helps support the wood. Having each section of the campervan slide out bed on a hinge is a total game-changer when accessing belongings kept below the bed. In our case, all our clothes and our shoe bin as well.
Screws | current prices here
We used black screws to screw together any bit of the bed that was showing or not. These screws are really just to hold together the bed slats and siding, while the Kreg jig screws (listed below) are the more heavy-duty ones providing support for the bed frame.
Kreg Jig Screws | grab them here
If you don’t have a Kreg Jig you’re missing out. A Kreg Jig is a simple tool that makes the framing of all things in the van so much stronger. A Kreg Jig and these Kreg Jig screws were used to support the legs of the van bed along with the major framing pieces of the bed as well.
1/2 Plywood (one sheet) | find it here
You do not need to go out and spend this much money on plywood. It’s insane how expensive wood is these days. The 1/2 inch plywood for the van bed is for the slats, and we just used scrap plywood that was given to us for this part of the van build.
We did a zigzag design with our bedding, which Jay is quite proud of, but you can totally just do strips of plywood with leftover 1/2 wood you have laying around.
2 x 2 x 8 “Furring Strip Board” (for leg support and framing) | check prices here
Furring strips are typically used for framing and attaching things like van panels to a van wall. However, they are also a great, cheap way to frame out a van as well. In our van, we use furring strips for the entire frame of the bed. Furring strips are used as the legs of the van bed, and all the support of the van.
We recently added L-brackets to the legs for added support. Probably not necessary for all the legs, but the front corner one kept getting bumped, so we wanted to give it some extra strength.
Waterproof Stain (semi-transparent tint based with coffee color) | find it here
Originally, we used a different stain than this for our bed, however, we soon realized we needed to use the same colored stain as the rest of the van. This is an important bit, as the stain shows, so you don’t want something that’s different than other bits of your van build.
After staining the wood, allow the bed wood sit out, as you want to get all the smell and fumes out of the wood, and you also don’t want to accidentally stain your cushions!
5 mm Plywood (for bed storage face) | current prices here

Since we didn’t use thick plywood to build out the van, and instead framed out the van with the 2 x 2s we had to cover the face of the pull-out frame with thin plywood. This worked out really well, keeping the van weight down and limiting the amount of extra space the face of the bed would take up.
Primer | order yours here
Primer is your best friend in a campervan build. We loved priming everything before painting it because primer dries super fast and can be painted on within a couple hours.. making the painting move along really quickly. This primer, Kilz, kills mold and mildew and prevents future growth of both.
Kilz came in super handy when repurposing reclaimed wood. You’ll definitely want to use it if repurposing wood yourself!
White Paint | check prices here
We were certain we wanted dark brown stain for the roof and counters with white as the walls and cabinets. We continued the white throughout the framing of the van bed, making the entire build flow together well.
White seems like a bad idea in a campervan, especially when living in a van with a cat, however, it’s actually super easy to clean! This paint is not the paint we used, however, it seems like a great one based on the reviews — and is actually really cheap for paint!
Our Campervan Slide Out Bed in Photos


More Details on Van Builds
Our Complete Minivan Camper Conversion
Tools Needed For Your Camper Conversion | every tool we used to convert our minivan into a campervan
Campervan Lighting Ideas | solar, full electric setup, and rechargeable
Choosing the Best Campervan Fridge | what to consider and different fridge options
Where to Put Your Campervan Stove | and the best stove options on the market
12 Essentials for Vanlife with a Cat | have a pet? bring it on the road!
Our First Campervan Van Tour | this one holds a special place in our hearts
Save + Share Here
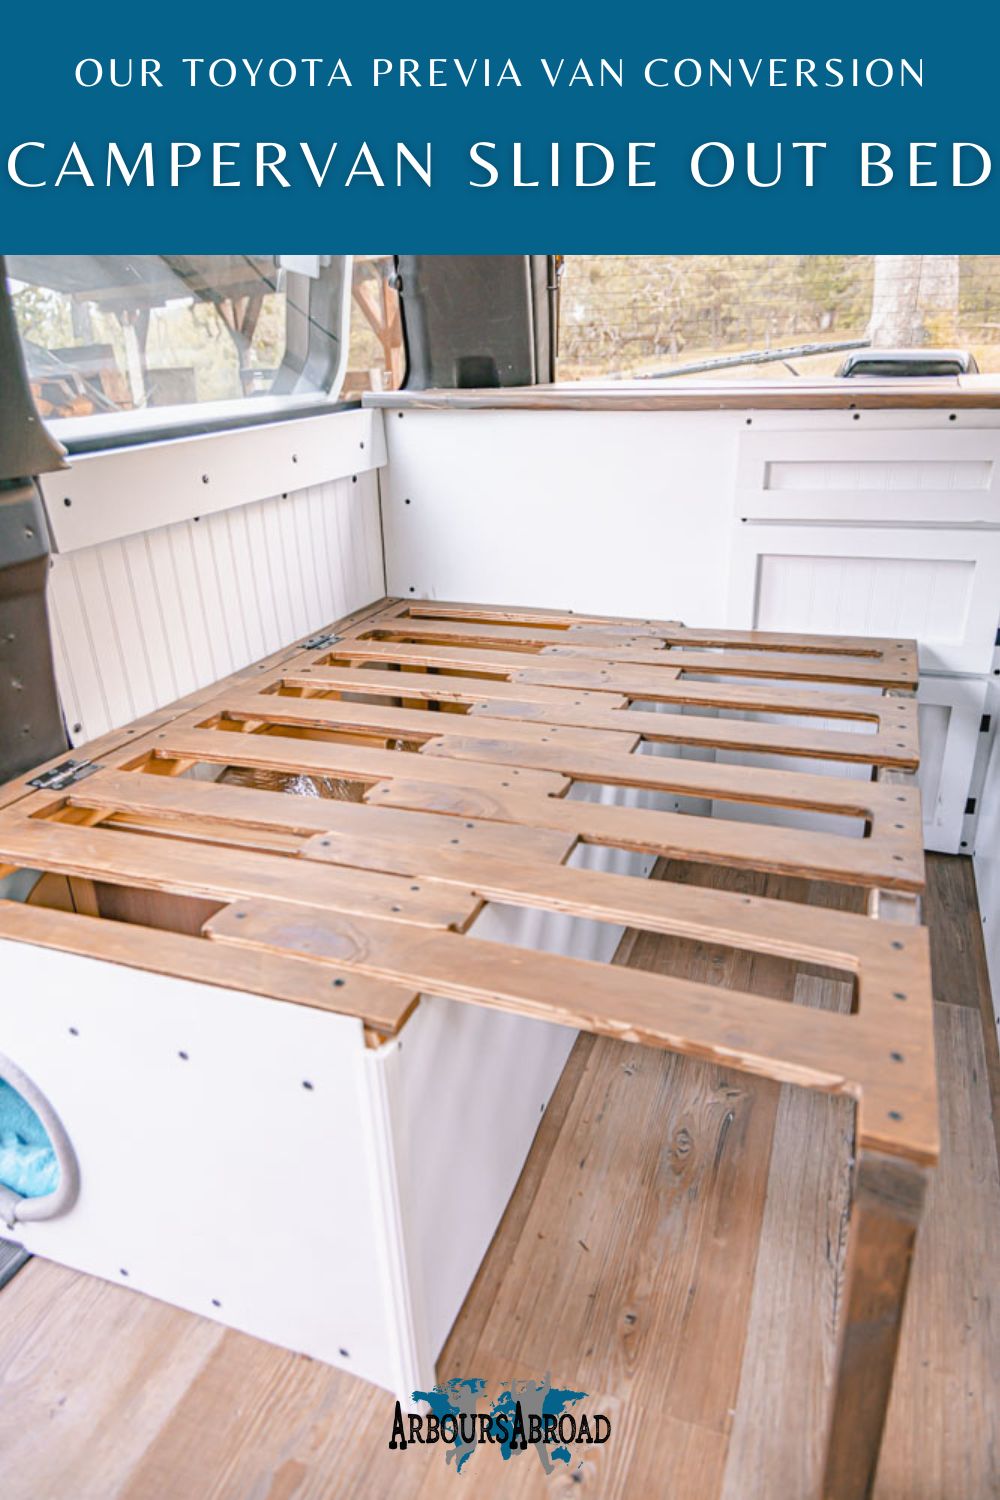
Did you like this post on our campervan slide out bed? It truly helps us tremendously when you save and share our posts with others! It’s a great way to show this post was helpful and we should write more like it in the future. Use these pictures to pin this post on Pinterest! Want to support us in a different way? Find out how here.


