

Have you ever gone on a trip hoping to capture that iconic, jaw-dropping photo, only to leave frustrated? You’re not alone. The reality is that perfect travel photos don’t happen by chance—they require research, preparation, and patience.
I’ve been there. Before I got serious about photography, I had no clue about ISO, shutter speed, or composition. Through trial and error, endless research, and real-world experience, I developed a bulletproof system to ensure I always walk away with photos I love.
Capturing the perfect travel photo is about more than just luck. It’s about understanding light, mastering composition, and being in the right place at the right time. The following guide will walk you through 10 foolproof steps that will help you create stunning travel photography, whether you’re exploring bustling cities, remote landscapes, or vibrant cultural sites.

This post contains affiliate links. As an Amazon Associate, we earn from qualifying purchases. If you buy through one of our links, we may earn a small commission at no extra cost to you. Read our full disclosure policy.
Get Inspired
Before you even pack your bags, you need to decide what you want to capture. I’ve learned that the best photos aren’t just about snapping what’s in front of you—they’re about telling a story. Inspiration can strike from any corner of the globe, and it’s important to gather visual ideas that spark your creativity.
For me, one of the most inspiring experiences was in the Scottish Highlands. I had seen stunning images of rolling hills, rugged mountains, and misty lochs (lakes), and I was determined to capture my own version. Scotland’s ever-changing weather offers the perfect opportunity to get dramatic light and atmospheric conditions, but it’s crucial to be prepared for whatever the elements throw your way.
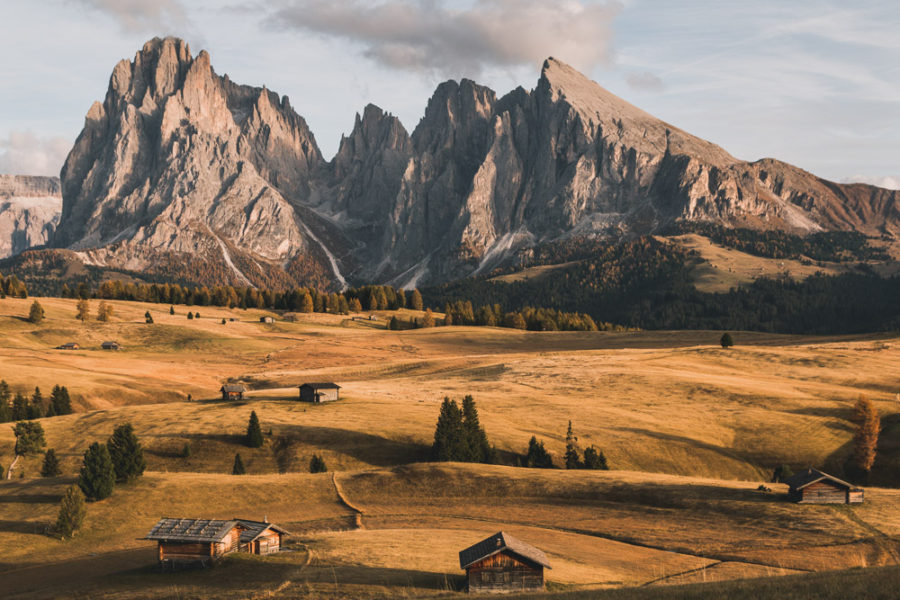
When I was in the Italian Dolomites, I noticed how the golden hour light painted the towering peaks in a soft glow. I spent a lot of time researching others’ photos and their settings beforehand, scrolling through Instagram and specifically 500px to find shots that resonated with me and provided inspiration. This research gave me an idea of how I wanted to approach my compositions and settings and allowed me to find unique angles to make my photos stand out.
Wherever you’re going, look for inspiration in magazines, travel brochures, social media, and professional photography platforms.
Practice Before Your Go
You’ve found your inspiration.
Now it’s time to practice.
It’s easy to assume that once you get to your destination, the magic will happen. But the truth is, photography is a skill that requires constant practice.
Before traveling to the Utah and Arizona deserts, I spent several weekends photographing landscapes in my hometown. I experimented with different camera settings, focal lengths, and compositions. The wide, open landscapes of the desert required me to practice wide-angle shots, and I also got comfortable with shooting in extreme lighting conditions, like shooting during the day. Something I knew I’d face in the desert heat.
Practice doesn’t just apply to shooting. It’s just as important to get comfortable with your editing software. I consistently spend hours in Lightroom refining my skills and adjusting contrast, exposure, and colors to enhance my shots. If I need to learn something new, I always head over to Youtube because inevitably, there’s always someone who posted about your question! You don’t want to arrive at your dream destination only to be overwhelmed by post-processing once you’re back home.


Research the Location
This step can’t be overstated. No matter how many photos you’ve seen or how many ideas you have in your head, if you don’t understand your location, you’ll miss out on some key opportunities.
When I traveled to Olympic National Park, I didn’t just look up beautiful spots. I researched the best time to shoot each location.
The towering trees of the Hoh Rain Forest, for example, required soft morning light to shine. That meant I had to plan an early morning shoot to avoid harsh sunlight. Unfortunately, we didn’t get up early enough, and the harsh light that I knew would be coming made for a difficult photo. Ultimately causing me to be dissatisfied with my shot.
For the Dolomites, some shots, I knew I needed to catch the light during golden hour to make the most of the alpenglow effect on the peaks. I also researched when the area would be least crowded, as tourists can quickly ruin a perfectly composed shot (e.g., going in the shoulder season).
With the right timing and patience, I was able to capture the breathtaking mountain views with hardly anyone in sight.
Don’t forget to check the season, time of day, and even the weather forecast. If you’re heading to a place with changing conditions like Scotland, plan for the unexpected. A little research will go a long way toward securing the perfect shot.
Take note of locations and compositions that speak to you by pinning their locations and settings/ideas of the shot on an offline map app like maps.me.

Check the Best Time to Shoot
In travel photography, things don’t always go as planned. No amount of research can control the weather, crowds, or unexpected events.
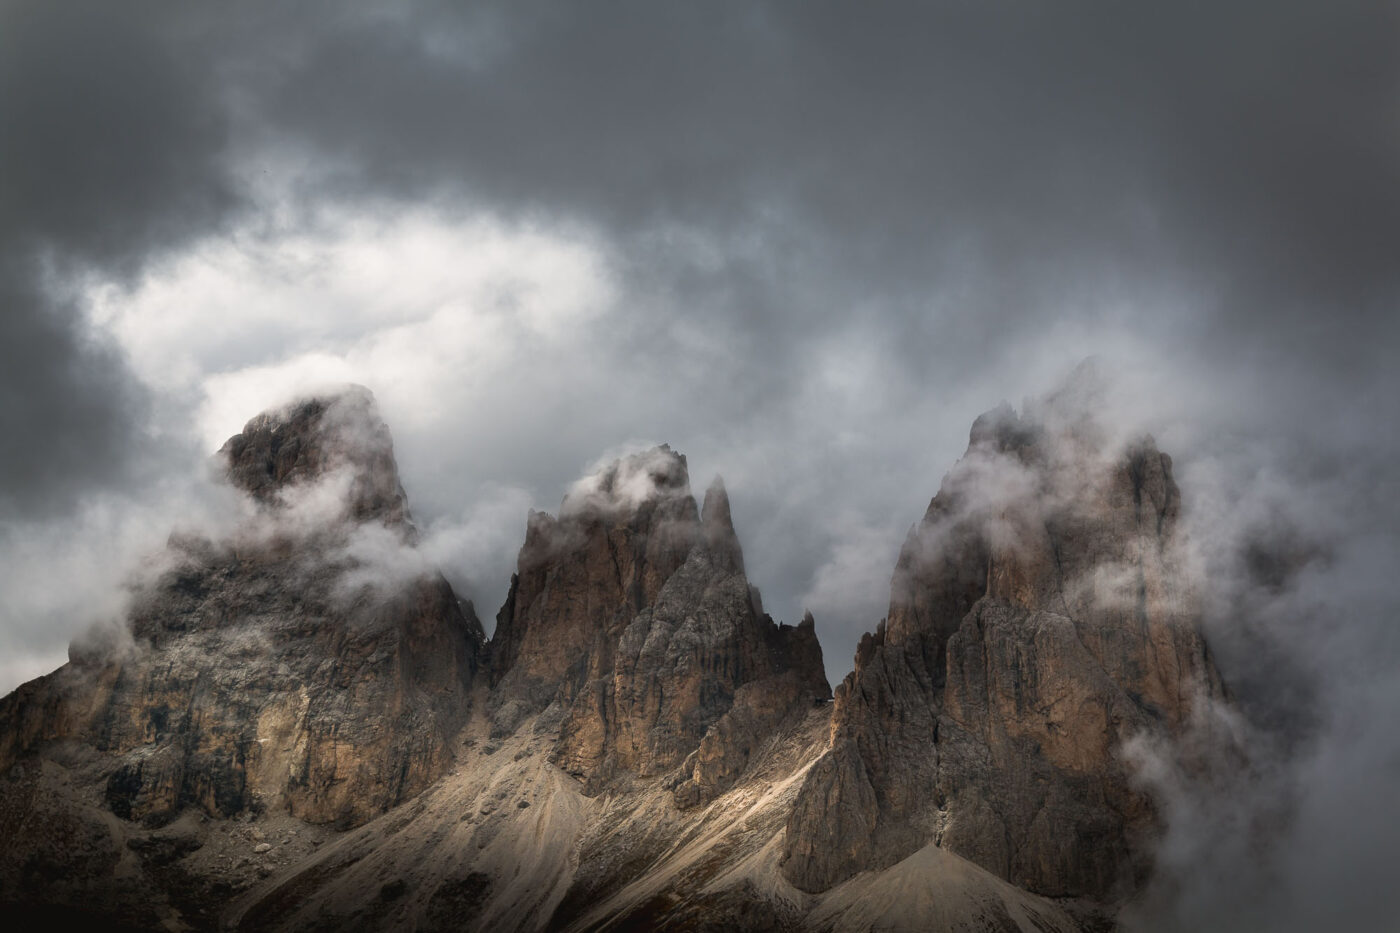
I’ve learned this firsthand when shooting Stella Pass in the Italian Dolomites. I had planned a sunrise shoot at near the summit, but by the time I arrived, a heavy fog had rolled in. I could barely see the iconic peaks, let alone capture them in the light I had hoped for. Instead of packing up and leaving, I decided to adapt and shoot the fog itself. It turned out to be one of my favorite images from the trip, and I was glad I embraced the unexpected.
Arrive Early and Scout
Timing is everything in photography, and that means arriving early. The light changes quickly, and you don’t want to miss the perfect moment because you were late.
In Sedona, Arizona, I made it a habit to arrive at my chosen spots well before sunrise. I’m a sucker for starbursts with the sun just peaking above the horizon, and it only lasts for a few minutes. If you don’t make the effort to be there early, you could miss the fleeting beauty that makes the shot so special.
Scouting the location is just as important as being early. If you’re shooting in an unfamiliar place, take the time to walk around and explore different perspectives and compositions. Sometimes, the best shots aren’t right where you think they’ll be.
In Sedona, on this one mountain biking ride, I discovered an unknown vista point that I believed would be an epic photo spot for sunrise. The next day, we went in for sunrise with ample time to do more scouting to find the best composition.
I would never have found that spot if I hadn’t taken the time to bike around and scout the area first.

Be Flexible
No matter how much planning you do, unexpected factors can always arise. Weather conditions, construction, or even large crowds might alter your original plan. Being adaptable will help you pivot when necessary. If your first plan doesn’t work out, have backup locations or compositions in mind. Sometimes, the best photos come from spontaneous moments rather than rigid planning.
I learned that the best photos often come when you stop rushing. If the light isn’t perfect yet, wait. If the crowd is in the way, give it time. Trust that the right moment will come, and when it does, you’ll be ready.
Get Our Best Guides, Free
No spam — Join our community of over 500+ readers receiving exclusive travel & photography tips, stories, and updates!
Execute with Creativity
Once you’ve set up, it’s time to start shooting. Don’t just settle for the first shot you take. Move around, experiment with different angles, and try new compositions.
This is one thing I dislike about most travel photographers (especially in photo workshops): they set up their tripod, claim their land, and never move around.
When shooting in the Pacific Northwest, I used the tall trees to frame the van and wildflowers in the foreground to add depth to Mt. Hood.


Try using a variety of lenses, incorporate filters, and adjust your exposure settings to get different effects. Don’t forget to change your perspective: crouch low, climb a rock, or shoot from above. The goal is to capture a unique take on a familiar scene no one has seen before!
Enjoy the Experience
As much as you want to capture the perfect travel photo, don’t forget to enjoy the experience. I often found that the most memorable moments happened when I wasn’t actively shooting.
Take time to absorb the beauty around you. Sit back and look at the scene from different angles. Listen to the sounds of the wilderness, feel the textures of the landscape, and breathe in the air. These sensory experiences will help you connect with the place and make your photos feel more authentic.
Another key point is, if you’re in a popular photography setting, reach out and chat with your fellow photographers. Collaborate with them, ask for insights and advice, share details, and maybe make a friend, too.
Post-Processing
Editing is where your vision comes to life. Whether you prefer bold colors or subtle tones, don’t be afraid to experiment. I love using Lightroom to adjust the contrast and add depth to my images. Or incorporate various masks to draw you in and focus on a certain area.
The key is to make the photo reflect your experience and what you saw. If you want it to look just like the scene in real life, go for it. If you want to add a creative twist, go ahead and get artistic.
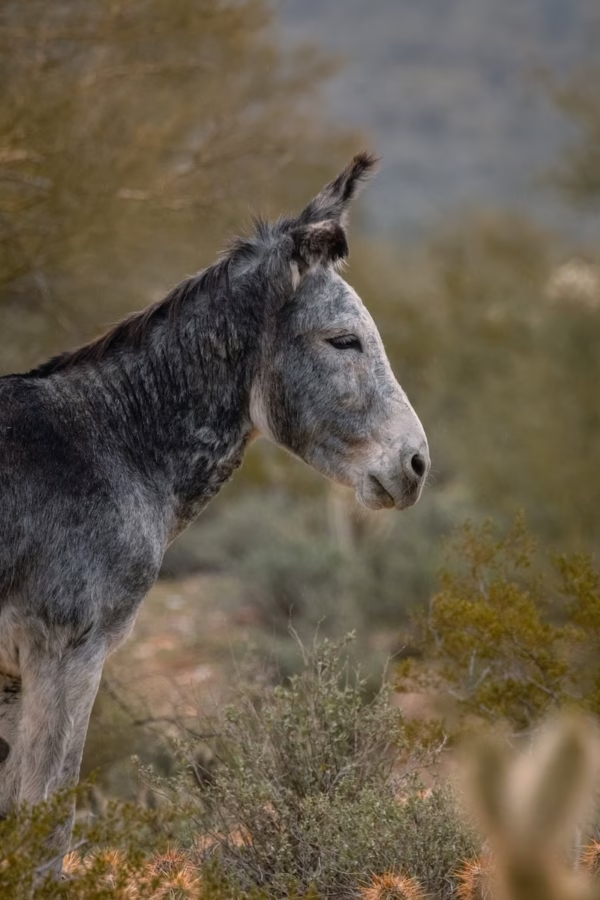
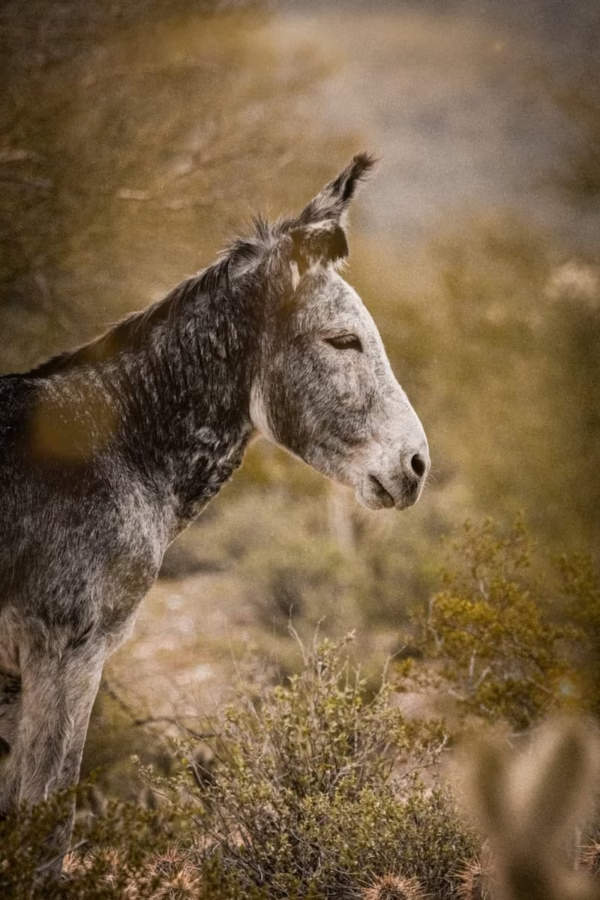
When I edited this photo of a burro (donkey) from a trip down to Arizona, it was very bland, not very exciting. So I took a twist to my normal editing style and added grain, a light effect overlay, more contrast, and various draw masks to really make the image come to life. See the difference below!
Share and Print
Once you’ve captured your perfect travel photo, it’s time to decide what to do with it. Will you post it on Instagram? Put it on 500px to help another aspiring photographer. Or will you print and frame it? Will you sell it as stock or elsewhere?
For me, I would love to print my favorite shots. However, that’s not very practical while living in a van full time. But I did print a few photos of the Dolomites when we lived in a house, and those, especially, look incredible as large prints on the wall.
Mostly, what I do is upload to Instagram and all the major stock photography agencies.
Share your work with others. Don’t keep it hidden on your hard drives. The world is waiting to see your unique perspective.
Begin Your Stock Journey Today
Depositphotos
Moderate Earning Potential
- Easy to use
- User friendly
- Keyword assistance
- High acceptance
- FTP available
Dreamstime
Good Earning Potential
- Difficult to use
- Requires more metadata
- AI keywording
- FTP available
Pond5
Great Community
- Hard to figure out
- Great payouts per photo
- User interface dated
- FTP available
Wirestock
Good Earning Potential
- Monthly Challenges
- Monthly submission limits
- Moderate acceptance
- FTP available
Shutterstock
Highest Earning Potential
- Most sales
- Easy upload via FTP
- Recommended shot list each month
- Best user interface
Final Thoughts
Capturing the perfect travel photo is more than just pointing and shooting—it’s about careful planning, creative execution, and a little bit of luck. Follow these 10 steps, experiment, and most importantly, enjoy the process.
Whether you’re photographing the foggy hills of Scotland, the sunlit peaks of the Dolomites, or the endless deserts of the American Southwest, the world is full of opportunities for stunning photography. It’s all about being prepared and ready to seize the moment.
So, what’s your next destination? Wherever it may be, remember: the perfect travel photo is out there, waiting for you to capture it.