

Fay Canyon is our favorite canyon in all of Sedona. With easy access to the Fay Canyon Arch, multiple cliff dwellings, and iconic Sedona views, we’re sure it will become your favorite too!
The Fay Canyon Arch is the easiest of the four arches in Sedona to reach! In fact, we’ll guide you there in five easy steps!

This post contains affiliate links. As an Amazon Associate, we earn from qualifying purchases. If you buy through one of our links, we may earn a small commission at no extra cost to you. Read our full disclosure policy.
Making The Most Of This Trail Guide
Pinnable Map | As with all of our trail guides for Sedona, we recommend downloading the free offline map app, maps.me. This app allows you to pin locations and even leave notes on each place.
This is a great way to visualize where different hikes in Sedona are, and an easy way to remember what you actually want to do and see.
Specifically for this hike, we’re sharing exact coordinates of places you need to to turn off the trail, where to park and more. However, it’s worth noting, the Fay Canyon Arch trail is actually on Maps.Me, making it super easy to follow along!
Trail Etiquette | Before we dive into the hiking guide, let’s cover some hiking basics. While hiking to the Fay Canyon arch, practice leave no trace principles, and pack out everything you pack in.
Be mindful of other hikers on the trail and photographers and people in the arch. Move aside if you’re moving slowly, and don’t spend too much time in the arch if others are waiting for their shot too.
Sedona Instagram Captions … share your photos without overthink the captions!
Fay Canyon Arch Trail Quick Facts
- Location | 34.90968, -111.861328
- Parking | Free at Fay Canyon Trailhead | 34.901928, -111.857348
- Duration | 1.6 miles total, out and back
- Elevation | minimal until you climb up to the arch
- Terrain | sandy trail with a rocky climb .2 miles to arch and back
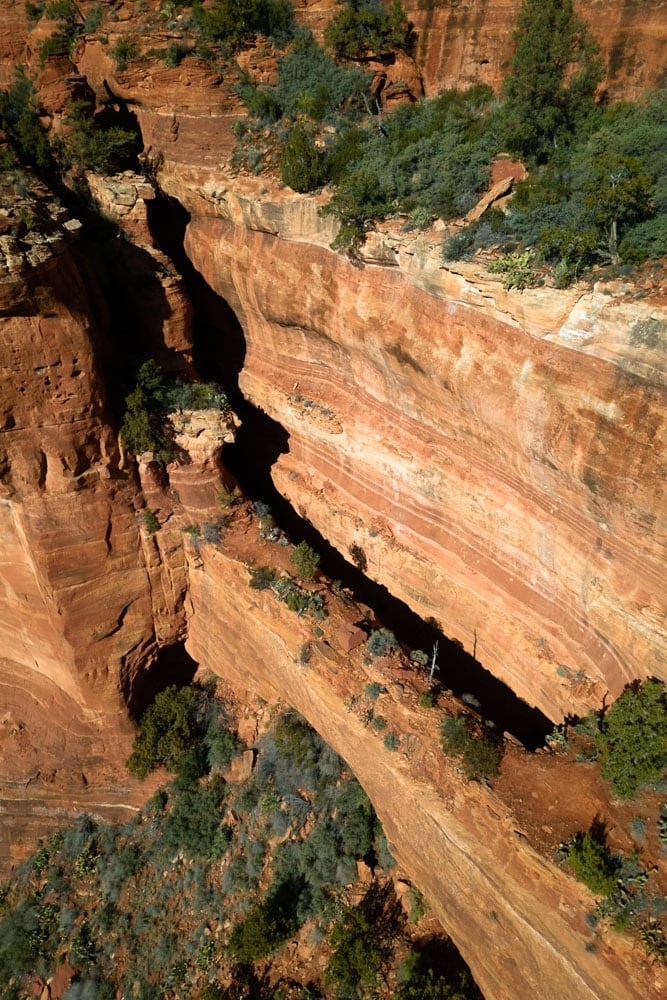
The Fay Canyon Arch Trail Guide in 5 Steps
Step 1 | Park at Fay Canyon Trailhead
- Parking Lot Coordinates | 34.901928, -111.857348
The Fay Canyon Trailhead is a really big parking lot that isn’t often full. There is a pit toilet and a small trash can in the parking lot, but be sure to bring your own toilet paper and hand sanitizer, as there is often neither here!
The Fay Canyon Trailhead parking lot is really weird in that it doesn’t actually have painted lines in it. If the edges of the parking lot are full, don’t worry, you can park two cars front to back all the way down the middle of the lot!
If by off chance the parking lot is full, there is some roadside parking in the area. Just be sure not to drive on vegetation!
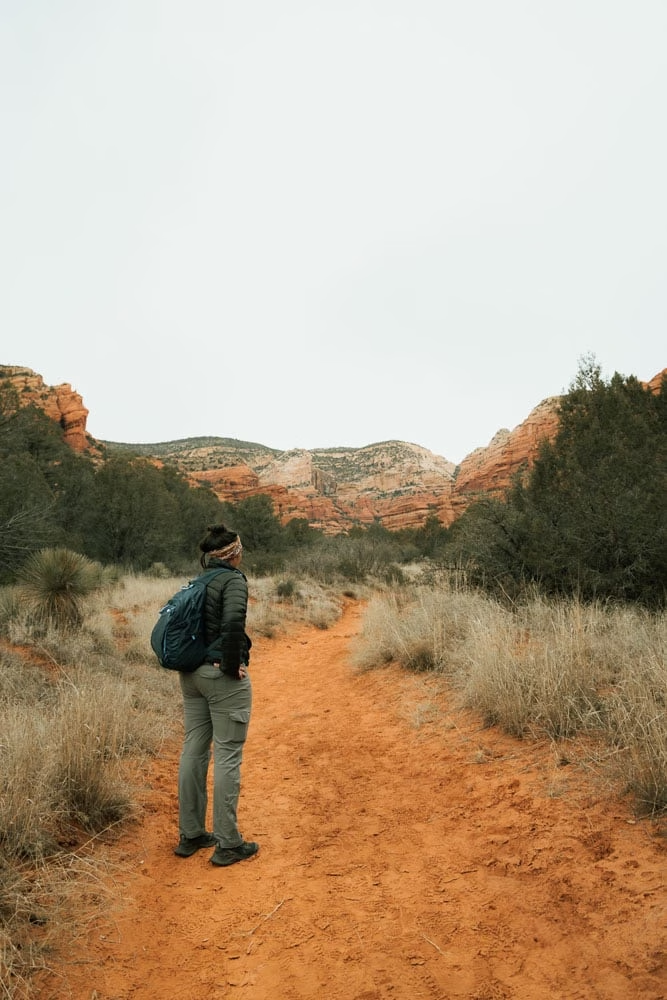
Step 2 | Hike on Fay Canyon Trail
- Fay Canyon Trailhead Coordinates | 34.901731, -111.857824
The Fay Canyon Trailhead is actually on the opposite side of the road as the parking lot. It’s directly opposite of the bathrooms.
Be sure to watch for cars and jeep tours when walking across the road, as this area is really busy and people drive fast!
You’ll see right away that the Fay Canyon Trail is a relatively flat, sandy trail, that’s wide and easy to hike along.
Enjoy the views of the towering red walls around you.. that’s one of my favorite parts of this trail! You’re immediately immersed in the giant canyon walls!
Step 3 | Turn Off Main Trail
- Coordinates For Turn-Off | 34.908473, -111.862826

Up until this point of the hike, the trail is really flat and sandy. In our experience, there are often people sitting on the rocks at this turn off point. I think they’re people who don’t wish to hike up to the arch while others in their group want to.
Honestly, it’s a great spot to relax in the shade!
The turn-off here is pretty obvious. You’ll immediately cross over a creek, which was dry every time we’ve done this hike.
From there, you follow the social trail through some trees, and then up the side of the canyon.
You should be able to look up and see the Fay Canyon Arch at this point!

Step 4 | Hike Up Rock Scurry
- Fay Canyon Arch Coordinates | 34.90968, -111.861328
There are multiple mini trails heading up to the arch. We’ve found that the trails weave and wind together, all reaching the same destination.
As you start to climb closer to the arch, keep in mind, that the rocks and dirt are loose! Be sure to have good footing, especially on the larger steps!
In my opinion, this is the most difficult part of the trail, as you’re climbing in direct sun, and the steps are super uneven.
Don’t worry though, this rock scurry climb only lasts .2 miles — you’ll soon be at the base of the arch!

Step 5 | Return The Way You Came
You made it!
You can hike up inside and all around the Fay Canyon Arch. And if you look around, you’ll also find a social trail that leads to getting up on top of the arch! Pretty sweet if you ask me!
Be sure to take care when inside and around the arch, as rocks and sand are loose!
Once you finish marveling at how cool this arch is, head back down the way you came, returning to the Fay Canyon Trail. If you still have some hiking left in you, be sure to hike to the end of Fay Canyon, the views are incredible!
Looking for other arches in Sedona? Check out these four Sedona arches!
Fay Canyon Arch FAQs
Can My Dog Hike With Me?
Yes, this arch isn’t an archeological site, so you’re dog can join.. however, it must be leashed!
How Long Is The Hike?
The hike is less than two miles out and back. I would suggest hiking to the end of Fay Canyon though too, which will add another mile to your hike!
Plan for 2 hours if hiking to both the arch and the end of Fay Canyon.
Is The Hike To Fay Canyon Arch Difficult
No. The majority of the hike is on a sandy trail until you reach the climb to the arch. At that point, you do have to maneuver over loose rocks and do some easy trail finding.
Best Times For Photographing Fay Canyon Arch
The arch is on the right side of the canyon, so it’s best to photograph in the afternoon if you want the inside to be lit up.
We suggest photographing the Fay Canyon Arch in the early afternoon, as late afternoon casts shadows throughout the canyon, and it will be difficult to photograph in that lighting!
Be sure to check out our photography tips to learn more about things to avoid and even look out for too!

Parking For Fay Canyon
The first few times we were in Sedona, there were no signs of paid for parking at Fay Canyon. However, after our most recent visit, it looked like a kiosk was going in.
If you have a National Park pass, this covers your parking. Alternatively, check out the options for the Red Rock Pass at the kiosk — if it’s there!
What To Pack For Hiking In Sedona
Packing List for Sedona | Our complete packing list for Sedona includes the best hiking shoes for Sedona, what you need on the trails, and a couple extra tips you may be surprised about!
Sun Protection | There’s not much shade on this trail, and the sun is strong in Sedona! Consider a lightweight sunshirt to protect your skin!
Backpack for Hands Free Hiking | Even though this trail is short, you should still bring water! We loved hiking with our water bladder inside a hiking day pack so we could use our hands for scrambling!
More Sedona Travel Guides
We’ve spent countless hours on the trails in Sedona. Hiking many of the trails multiple times, finding social trails leading to arches, secret caves, and ancient cliff dwellings.
If you liked this Sedona trail guide, we think you’ll probably like the ones below too!
How to Find the Subway Cave in 5 Easy Steps | Just like this post, but for the famous Sedona Subway Cave.
Where to Disperse Camp Near Sedona for Free | We’ve camped in nearly all the free camping locations in Sedona.. and this is our complete guide.
5 Things To Know Before Going To Sedona | Be sure to read this before leaving for Sedona — these tips will make your trip less stressful!
Loy Canyon Trail | A secret canyon hike to cliff dwellings and rock art!