ArboursAbroad contains affiliate links. As an Amazon Associate, we earn from qualifying purchases. If you purchase using one of the affiliated links, we may receive compensation at no extra cost to you. See our Disclosure Policy for more information.
Making van window covers not only offers you added privacy, but if done right, window covers also play a huge role in insulating your campervan. When making DIY van window covers, it’s easy to think of aesthetics above all. And we’ll be the first to say that proper insulating van window covers are not aesthetically pleasing. However, in the end, when you’re in freezing temperatures in the van or in extreme heat, you’ll be sorry if you chose aesthetically pleasing over properly insulating.
In this guide to how to make DIY insulated van window covers, you’ll not find us covering Reflectix with pretty fabric, because after all, if you do that, there’s no reason to spend the money on Reflectix in the first place.
If you would like to watch more videos on our build out series, please watch the full list of camervan buildout here.
HOW REFLECTIX WORKS FOR INSULATING
There are many different kinds of insulation, but Reflectix works as a radiant heat barrier. As you may assume from the name, Reflectix needs to be able to reflect heat or cool temperatures to actually do its job in insulating. Both heat and coolness hit the Reflectix material, then bounce off and reflect elsewhere instead of penetrating through the Reflectix.
When covering Reflectix with fabric, or really anything, (van panels, ceiling material, etc.) the Reflectix loses it’s R-value. The R-value is the number given for how well something insulates. Covering the Reflectix does not allow it to reflect heat or cool air, diminishing the R-Value. This changes the insulated van window covers into just simple van window covers. Defeating the entire purpose and use for the Reflectix material immediately.
WHAT VEHICLES YOU CAN MAKE REFLECTIX WINDOW COVERINGS FOR
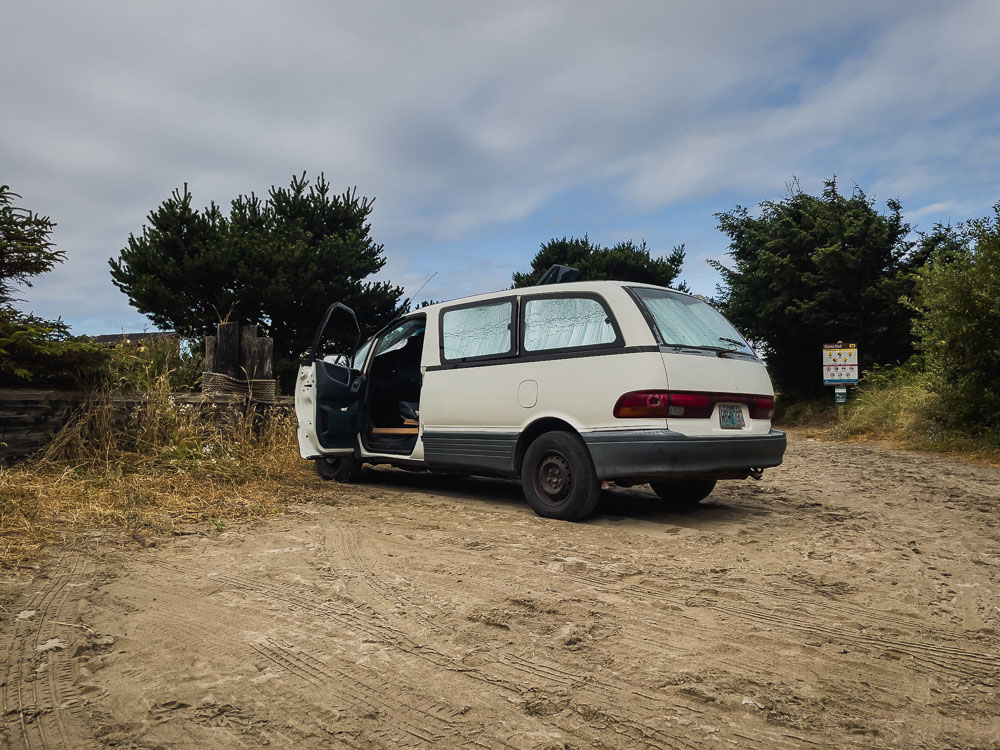
In the how to video above, we are making the van window coverings for our 1992 Toyota Previa, a minivan that we converted into a campervan. While the video and pictures in this post are from that van conversion, you can use Reflectix for the following…
- Ford Transit Window Covers
- Mercedes Sprinter Van Window Covers
- Pro Master Window Covers
- Ford Econoline Window Covers
- Reflectix RV Window Covers
- Truly Any Vehicle Needing Insulated Window Coverings
Material list for making diy insulated van window covers
Crayons
Any color crayon will work just fine, but the darker the better. You’ll be using a crayon to trace the stencil of your window on the newspaper.
A pencil, pen, or even marker will not work as they’ll puncture/rip the newspaper or even bleed through the paper creating holes or makes on your van.
Newspaper
I found that newspaper works tremendously well for creating a stencil for your van window coverings. Since newspaper is so thin, you’ll be able to see the light through it, and know exactly where to draw your lines for the perimeter of your window! Don’t go and buy any fancy stenciling paper, newspaper is flimsy, but with a little bit of tape, it does the trick!
I’m linking plain newspaper here, but seriously, just ask your neighbor or a store for their newspaper when they’re finished with it! The print on the newspaper really doesn’t get in the way for this job!
Tape
You don’t need any specific kind of tape. I’m linking painter’s tape, because if you have your van build done, painter’s tape won’t ruin the paint or walls. However, if you’re making your van window covers at the beginning of your build, you can use just regular tape or masking tape.
The use for tape is really to just be able to hold the newspaper in place when tracing the window stencil. If you have extra hands, they can work as the tape, thus not needing tape at all to make your van window coverings!
Scissors
Trust me when I say you want to have a nice, sharp pair of scissors for cutting the Reflectix. Any scissors will work for cutting the newspaper stencil, but the Reflectix is tough to cut.
I used a dull, cheap pair of scissors when cutting my pieces and it was so freaking annoying, I don’t know why I didn’t just run inside and use our kitchen scissors instead.
Reflectix
Obviously, you need Reflectix to make Reflectix window coverings. There’s a local hardware store called Ace nearby our house that we purchase the Reflectix in a huge 5 feet by 4 feet piece to make our front window covering. The rest of the Reflectix we used was given to us as a Christmas gift from our family, purchased from Amazon. These rolls were the perfect size for all the smaller windows in our van, and would be perfect for any other van conversion.
If you can get your hands on a larger roll, where you purchase the Reflectix by the foot, we recommend doing so, as the price per square foot is about the same, but this way you can purchase the exact amount you need.
Black Sharpie
We suggest using a black sharpie for tracing the stencil of each window onto the Reflectix. We specifically suggest black, as you will likely have remnants of the black on the Reflectix window covering piece, and it doesn’t stand out as much as a colored market.
And we specifically suggest a sharpie, as a pen doesn’t write well on Reflectix, and also is more likely to puncture a hole in the Reflectix piece.
How to make diy van window covers
Step 1 | Gather Materials
You can see the materials list we have above. This is legitimately the only materials you’ll need to make your van window coverings. You’ll be surprised how well they stay in the windows without magnets if you cut them perfectly to size.
Step 2 | Make Stencils With Newspaper
This is by far the hardest part of making DIY Reflectix window covers. So I’m going to break this into multiple mini-steps.
- Grab a piece of newspaper and see if it’s large enough for the window you’re covering. If not, tape multiple pieces of newspaper together.
- Use the tape to hang the newspaper just above the window. Press newspaper along the perimeter of the window to ensure it’s large enough.
- Use a crayon and run along the inside perimeter of the window. It helps to run a little at a time, section by section, holding newspaper in place with other hand/arm.
- Before taking down, run finger along the entire crayon line, along the whole edge. Make sure that your finger is in the corner/edge of the window. If not, then redo your crayon line.
Step 3 | Cut Stencil Out
Take down the newspaper piece, and cut out the new stencil. I suggest cutting along the outside line of the crayon mark, this way you can trim a little if need be in different sections instead of having to trace an entire new stencil.
Step 4 | Test Fit Stencil
Test fit your newspaper window covering stencil to ensure perfect fit. You should not be able to see any part of the actual window in this step.
Step 5 | Repeat Steps 2 & 3 With All Windows
Repeat steps two and three with each window you’re going to create a van window cover for. Yes, even the tiny triangle windows in the front of the van. Your insulated window covers will be made the same for your rear window and sliding door window cover too.
We had the most difficulty with our rear door window, as the rear window has the defroster kit in it. However, this is no different than your other windows. Just cut a slit in your camper van window covers, where the defroster gadgets sit, and you’re good to go.
The point of this step is to get a stencil for each window so you can lay them all out on your Reflectix and figure out the best way to cut out your window coverings (next step).

Step 6 | Lay Out Stencils on Reflectix
Take each newspaper stencil you just created and figure out the best way to lay them out on your Reflectix to allow for the least amount of waste. You can twist, turn, and flip the stencils however you need in this step, as it won’t matter when you cut them out.
Again, this step is for the sole purpose of having the least amount of Reflectix left over. You will inevitably have strips of Reflectix that are extra. You can use these to make homemade coozies for your van later!
Step 7 | Outline Van Window Stencils
Use a sharpie and outline your campervan window cover stencils. A sharpie is an important tool to use here, as it will not puncture the Reflectix.
Step 8 | Cut Out DIY Reflectix Window Covers
Take sharp scissors and cut out your newly drawn window covers. Be sure to cut along the outside of your sharpie lines, as again, you can always trim the window covers as needed.
Cutting along the outside of the sharpie lines also allows you to have a bit of wiggle room to really shove the window coverings in place, eliminating the need for magnets or hooks!
Step 9 | Test Fit the Reflectix Van Window Covers
Test fit each window cover and trim any extra Reflectix as needed. Be sure to not trim too much though, as this will make your Reflectix van window coverings not blackout anymore! You don’t want it to be shy of the framing of the window in any place, or light will shine through. And at the same time, you don’t want any extra Reflectix around the window, as this causes the Reflectix to bubble and not stay in place.
Step 10 | Cut Out Window Access Points
In our van, each window opens with a little window lever. If the windows you’re covering also have points you need to access, make small slits in the Reflectix to provide access to those parts. Be sure to not cut large sections out here. Make small, really small, slits and test it over and over again, making sure you don’t cut out too much.
When I cut the slit for the first window, I cut too big of a line, thus creating a spot for light to come into the van, as well as escape the van. So we then had to cut an entire new window cover for that window! Not fun! Don’t make that mistake, and just cut small cuts at a time!
What About Magnets?!
Our DIY van window covers stay in the windows without magnets or any kind of hook. If you cut the Reflectix to a tight fit in your window, you should not need any magnets or hooks.
Our windows in our minivan conversion are really big, bigger than most van windows, and they never sag or fall out of the window frame.
The only windows that could use hooks is our windshield cover, as it’s nearly 4 ft by 5 ft! With that said, we just pop down our sun visors and are good to go with the entire window being covered!
If you really want to use magnets, then check out rare earth magnets. Find them here. To use them, tape them onto your window coverings, or tape a little tab on the edge of your coverings and put one of these inside the tab.
Won’t The Van Window Coverings Look Weird?
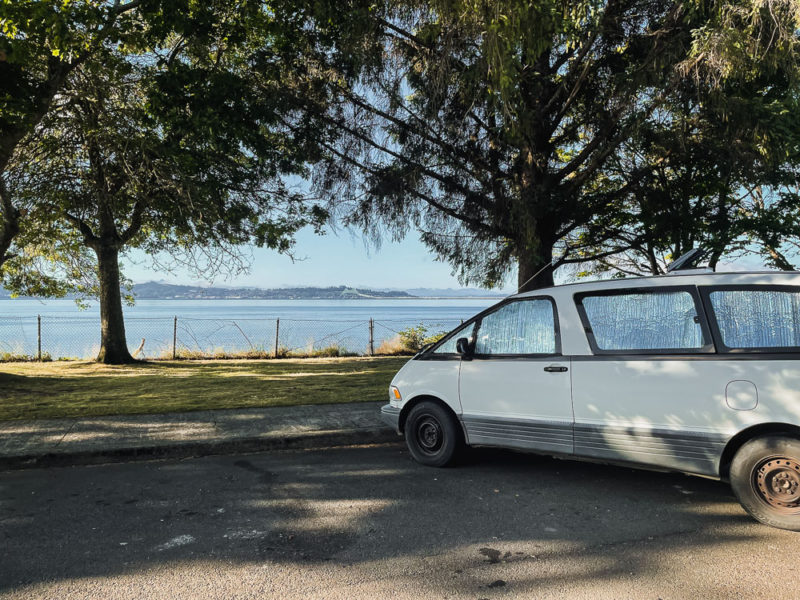
The short answer to this question is yes. Having Reflectix as van window coverings literally makes our van look like a spaceship. Our windows are not tinted at all, so it looks like a spaceship on both the inside and the outside of the van. Not a good look for stealth camping!
With that said, we’d rather have a spaceship-looking van than be too hot in the summer and too cold in the winter. We were in temperatures well below freezing multiple times this past winter in the van, and the Reflectix did an amazing job keeping us warm inside the van!
It not only reflected the coldness from outside the van away from the van, but it also reflected the heat from our bodies into the van, created a warm little box to be in! The science behind Reflectix is truly amazing!
What if I really Want My Van Cute?!
If you’re super concerned with how your van looks on the outside, tint the windows. The Reflectix will still do it’s job, but it won’t look as obviously from the exterior of your campervan.
If you’re really concerned with how the van looks on the inside, grab some curtains with rod pockets and wire, and hang some curtains to cover the Reflectix when you don’t want to be in a spaceship! Honestly, though, does it really matter!?
We have one black out curtain hung between the front cab of our van and the back living area. This works well for blacking out the light when we don’t want to or don’t need to put up the Reflectix in all the windows. It also is a great privacy curtain for pulling when we need to use the bathroom or change in the van.
Where Should I Store My Reflectix Van Window Covers?
You want to be careful in storing your DIY Reflectix window covers as you don’t want to puncture the bubbles in the Reflectix, and you also don’t want to tear the sheets. We created a small shelf above the front cab of our campervan where we can slide the Reflectix right into. Keeping the Reflectix flat instead of rolling them to store it is a great way to lengthen the longevity of your diy window covers!
You can also think about creating a space around your fridge to store your Reflectix window covers. This way, when not in use, they’re keeping your campervan fridge insulated!
You May Like this Van Build Posts Next
Insulating Your Campervan Floor
Campervan Floor Mistakes to Avoid
A Complete Step by Step Guide to Installing Your Campervan Floor
Getting Campervan Insurance for Van Life
The Best Campervan Toilets + Other Bathroom Options
Save + Share
Sharing this post is a great way to show us this post was useful to you! It’s kind of like a virtual high five and thank you! It helps our small business out tremendously when you share our content!! If this post has helped you, use the picture below to share it with others! Thanks!!