ArboursAbroad contains affiliate links. As an Amazon Associate, we earn from qualifying purchases. If you purchase using one of the affiliated links, we may receive compensation at no extra cost to you. See our Disclosure Policy for more information.
After our first van had a plain plywood roof, we wanted something a bit more cozy for our minivan campervan ceiling material. When our grandparents offered us old wood flooring, we knew exactly what to do with it. Sand it down, stain it, and install it as our new minivan campervan ceiling.
It’s not as simple as just tacking up some old wood flooring. There’s insulation, rust treatment, and furring that need to be installed before the final ceiling cover. This post is about every aspect of our campervan ceiling. All the things we used to turn a minivan with a normal headliner into the ceiling of our dreams!

Minivan Campervan Ceiling Materials
1 inch Polyiso Foam Board Insulation
1/2 inch Plywood (cut into two-inch strips for securing tongue and groove)
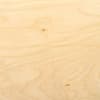
Tongue and Groove Flooring (salvaged from grandparent’s yard)
Waterproof Stain (coffee color, semi-transparent tint based)
Rustoleum Rust Prevention Spray Paint (1 can)
Dimmable White Recessed Lights (set of four)
Corrugated Plastic (1/2 sheet for above front cab shelf)
L brackets Or Bendable Metal (for supporting shelf)
A Closer Look at Our Campervan Ceiling Material
1 inch Polyiso Foam Board Insulation | snag some here
The quickest and easiest way to insulate the van ceiling was with polyiso foam board insulation. This stuff comes in a 4 x 8 sheet from your local hardware store, and is super easy to cut to size!
For our campervan ceiling, that just meant strips of insulation between the ribs and furring strips of the van! Sticking it to the roof was no problem, using the Great Stuff Expanding Foam, listed below. We chose to not use glue, as glue doesn’t add that extra insulation factor to the gaps and cracks!
Great Stuff Expanding Foam | check prices here
Great Stuff Expanding Foam is a spray foam insulation that works to seal gaps and cracks. Its main purpose is to insulate areas you can’t really reach with the foam board insulation. However, it’s also fantastic as glue! We used spray from around the edges of all our polyiso sheet foam insulation boards to keep them in place. It doubled as a way to make sure the space behind the furring strips and ribs were also insulated!
3M Mounting Tape | current prices here
Honestly, if we didn’t have 3M mounting tape for other bits of the van conversion, we likely would not have used it here. We used the 3M mounting tape in the center of each of the insulation sheets instead of using the spray foam. We didn’t want the spray foam to expand and push the insulation out further than we wanted, so we thought 3M tape would be best for this part of the build.
Really though, the spray foam along the edges of the insulation sheets, and the fact that the insulation sheets were really jammed into the roof, make the 3M mounting tape not necessary.
1/2 inch Plywood (cut into two-inch strips for securing tongue and groove) | find it here
Since we decided on tongue and groove flooring for our campervan roof, we needed something to drill the tongue and groove flooring into piece by piece. We chose to run strips of plywood used as furring strips along the ribs of the van roof. These worked as a place to drill and secure each piece of tongue and groove flooring.
We had strips of plywood laying around the house from other projects that we used for this part. And actually, we could have used any scrap pieces of plywood because each cut for the furring strips was only about six inches long by 2 inches wide. This was due to the curvature of the van roof. In a van with a flatter roof, you’d likely not cut the furring strips so small, as the whole point is to have a sturdy base to screw other wood into instead of screwing so many screws into the metal frame of the van.
Self Drilling Screws | find them here
Self-drilling screws are a life saver in a van build. Especially when drilling into the van roof. They make it so much easier to penetrate the metal! These screws worked really well for the campervan ceiling, as we didn’t want them too long, poking through more than just the ribs of the van, but also needed them long enough to really secure the plywood strips in place.
Hike Crew 11in Roof Vent/Fan | find it here
It wasn’t until we started looking into campervan fans that we realized there are so many different types of van fans on the market. Honestly, we were looking for one with a small footprint, and that’s why we chose the one we did. This Hike Crew fan is only 11 x 11 inches, meaning it takes up less space both inside the van, and on the roof… a major thing for us with our roof layout.
READ MORE | Complete Guide to Installing a Campervan Fan
Tongue and Groove Flooring | check prices here
I just love the idea of repurposing and reclaiming wood. Our grandparents had a stack of old wood flooring that was getting rotten and moldy out on a hill. When they said we could use it if we had any idea of how to use it, we knew immediately it would make the perfect ceiling for our campervan. A bit of elbow grease… okay, fine.. a lot of elbow grease and hours and hours of sanding later, the tongue and groove flooring looks great!
If you can get your hands on some wood to repurpose, definitely do that.. otherwise, we’ve linked tongue and groove flooring that’s similar to what we used here.
Waterproof Stain (coffee color, semi-transparent tint based) | find it here

We had a vision for the look of our van, and that was a dark brown wood for the ceiling and countertops with a bright white paint for the walls and cabinets. This stain nailed that look! It’s waterproof, which is great for being able to wipe down, and it doesn’t have the super strong stain smell. Perfect for staining and putting right into the van.
One thing we didn’t do was stain all sides of the wood, and we wished we had. There are some spots in the ceiling where the tongue and groove flooring didn’t lay perfectly, exposing bits of the sides and underside of the wood. This doesn’t look great and would have blended in better had we stained all sides of the wood before installing. The other area it shows is where the ceiling comes down around the windows a bit. Again, had we stained the backside of the flooring, this would look much better!
Rustoleum Rust Prevention Spray Paint (1 can) | current pricing here
Rustoleum is a life saver in the DIY van build world! Any time you expose metal, like when drilling new holes in the van frame, you need to treat the metal to prevent rust. Rustoleum is the paint for the job. It also works to stop rust that has already formed. Something we found in a few areas of the van ceiling. Simply sanding down the bigger rust chunks (if there are any) and then spray painting a new coat of rust-treating paint on the top seals the deal!
We do wish we had sprayed more of the corners in the van with Black Rustoleum too. This way, any metal peeking through areas of imperfection in the ceiling would just blend in, instead of standing out being white!
Dimmable White Recessed Lights (set of four) | grab yours here
When we bought our first campervan, it was already partially converted. And it had super bright shop lights as the ceiling lights. We hardly ever used them because they were so bright. In our second build, we knew we wanted soft white lights that could be super bright if needed, but could also be dimmed to set a relaxing mood in the evenings. These lights did the trick! They sit flush with the ceiling, are super easy to install, and look good!!
To cut the holes for the lights, we used a hole saw set like this. It made cutting the holes a piece of cake!
Coroplast (1/2 sheet for above front cab shelf) | find some here
Originally, we had planned to continue the wood flooring as our ceiling all the way to the front of the van. However, the curvature of the minivan roof was way too hard to work with, making a long piece of wood nearly impossible to form to the curve without wasting a ton of space. Instead, we worked smarter.. we decided it wasn’t worth the hours of time and frustration to try and make the wood form to shape, and instead used super malleable coroplast for the front cab of the van.
Coroplast is what we used for an air gap under our flexible solar panels, and it was perfect for bending and folding to the shape of the front cab. While it’s not the cutest material, it didn’t really matter, because we would be installing a shelf covering the entire ceiling in the front cab. The thin material worked perfectly for providing as much shelf space as possible in the cab shelf below the coroplast!
5 mm Plywood (for the shelf) | current prices here
We’ll be the first to say our over cab shelf is so jerry-rigged, it’s insane. But hey, it works well and provides so much extra space to store things in the van. Our shelf is made from thin 5 mm plywood because we really just needed the thinnest material that would actually look good on the underside. This thin plywood wouldn’t work if we were storing something heavy on the shelf, but since we use the shelf for just Reflectix window covering storage, the 5 mm plywood is perfect!
We trimmed out the plywood with scrap wood we had, and also added a thicker supporting piece across the front of the shelf.
L brackets Or Bendable Metal (for supporting shelf) | grab them here
Remember how I said this shelf was completely jerry-rigged? This part of the shelf is a prime example. We didn’t use actual L-brackets on this shelf, but instead salvaged some metal strips and used those instead. L-brackets would do the job though had we not had other metal laying around!
Our Campervan Ceiling in Photos


More Details on Our Campervan Ceiling
5 Camper Van Ceiling Ideas | ranging from really cheap to rather spendy
How to Install a Camper Van Fan
Choosing the Best Camper Van Fan for You
9 Reasons You Really Do Need a Campervan Fan
Start to Finish Installing a Campervan Ceiling | including materials and tools needed
More Details on Van Builds
Our Complete Campervan Minivan Conversion
DIY Insulated Window Coverings
How to Insulate Your Van Floor
Save + Share
Did you like this post on our campervan ceiling material? It truly helps us tremendously when you save and share our posts with others! It’s a great way to show this post was helpful and we should write more like it in the future. Use these pictures to pin this post on Pinterest! Want to support us in a different way? Find out how here.